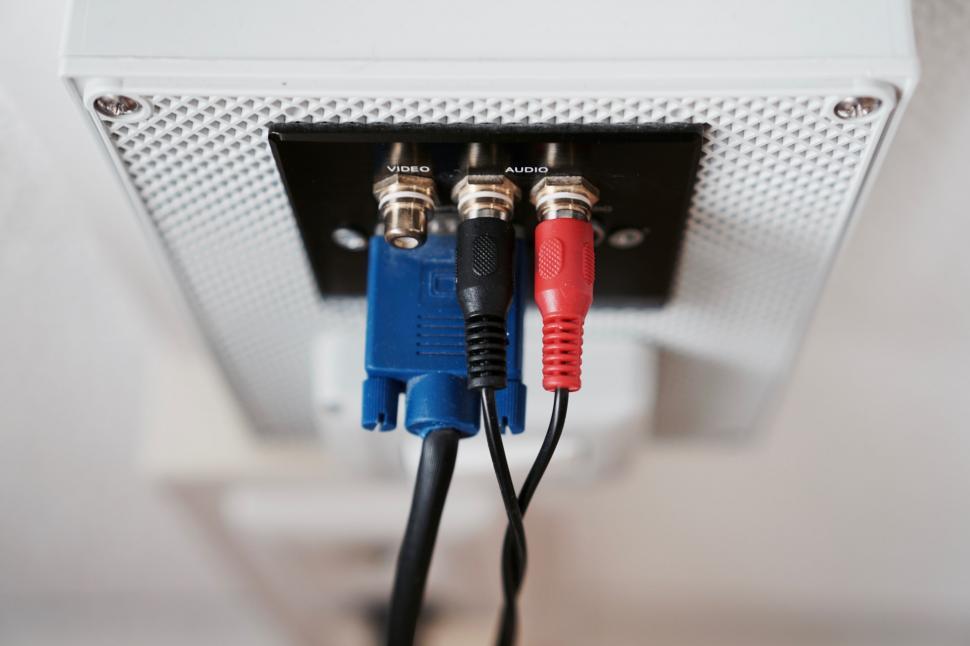
Ensuring your security camera is connected to a reliable power source is crucial for its continuous operation. Here’s a step-by-step guide to help you connect your security camera to a power supply:
Step 1: Identify the Power Requirements
- Check the Voltage: Most security cameras operate on 12V DC or 24V AC. Refer to the camera’s manual to confirm the correct voltage.
- Power Adapter: Ensure you have the appropriate power adapter for your camera. The adapter should match the voltage and current requirements specified by the manufacturer.
Step 2: Gather Necessary Equipment
- Power Adapter: A compatible adapter to convert AC power from an outlet to the DC power needed by the camera.
- Power Extension Cable: If the camera is far from the power source, you may need an extension cable.
- Power Splitter (Optional): If you are powering multiple cameras from a single power source, a power splitter can distribute the power to each camera.
Step 3: Connect the Power Adapter
- Plug into the Outlet: Connect the power adapter to a nearby electrical outlet.
- Connect the Adapter to the Camera: Insert the power adapter’s connector into the power input port on the camera. Ensure it fits snugly and securely.
Step 4: Use a Power Extension Cable (If Needed)
- Connect Extension Cable: If the camera is located far from the power source, use a power extension cable. Plug one end into the camera and the other end into the power adapter.
- Secure the Cable: Ensure the extension cable is securely connected and route it along a safe path to avoid tripping hazards or damage.
Step 5: Power On the Camera
- Turn On: Once connected, power on the camera using the switch or button (if applicable). The camera should begin to operate immediately.
- Check Indicators: Look for any indicator lights on the camera that confirm it is receiving power and functioning correctly.
Step 6: Troubleshooting
- Check Connections: If the camera does not power on, double-check all connections to ensure they are secure.
- Inspect Cables: Look for any damage or wear on the cables and replace them if necessary.
- Verify Power Source: Ensure the electrical outlet is working by testing it with another device.
Related Products
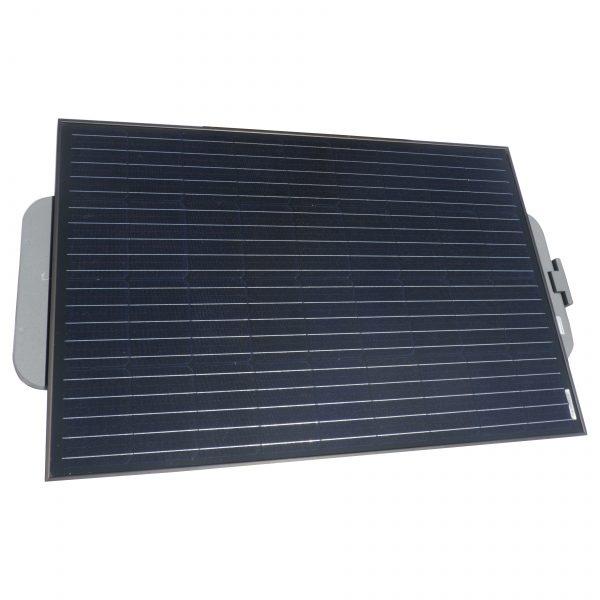
120W Solar Panel W/ Controller & 45Ahr Battery
Specifications
- System Output Voltage: 12.8V DC (11.1V DC to 14.6V DC)
- System Output Current: 1A
- Idling Power Consumption: < 0.5W
- Solar Panel Type: Monocrystalline silicon
- Solar Panel Max Power: 120W
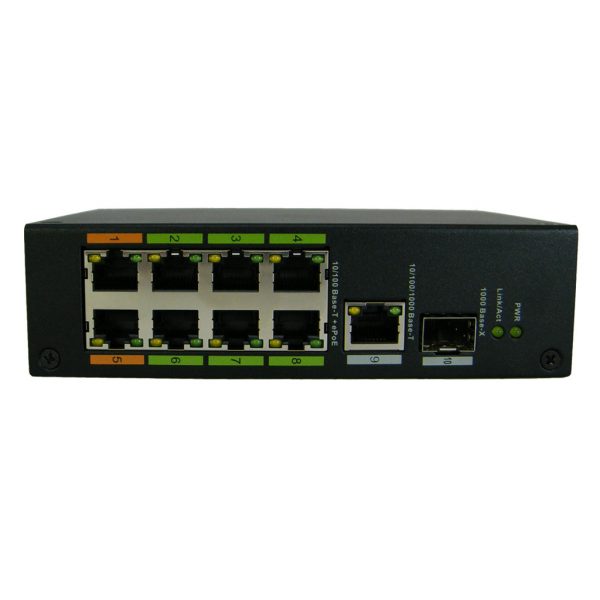
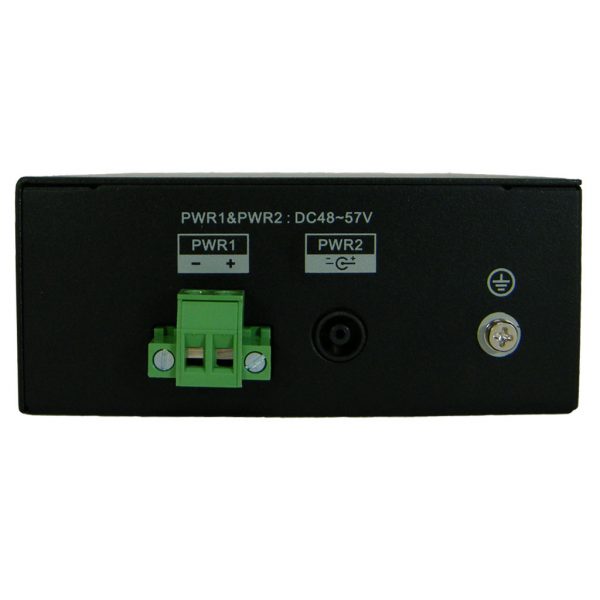
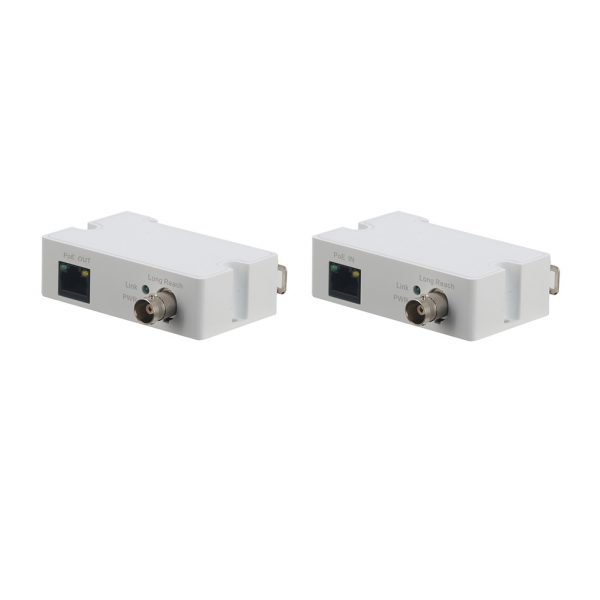
8 Port ePOE Switch (8FE ePOE/1GE/1GX)
Specifications
- Ports: 8
- PoE Power Consumption: Ports 1, 5 ≤60W | Ports 2, 3, 4, 6, 7, 8 ≤30W
- PoE Power Supply: DC48~57V
- Switching Capacity: 8.8Gbps
Frequently Asked Questions (FAQ)
- What is the typical voltage for security cameras?
- Most security cameras operate on 12V DC or 24V AC. Check the camera’s manual for specific requirements.
- Can I use a power extension cable for my security camera?
- Yes, if the camera is far from the power source, a power extension cable can be used to extend the reach of the power adapter.
- What should I do if my camera does not power on?
- Check all connections, inspect the cables for damage, and verify that the power source is functioning properly.
- Can I power multiple cameras from a single power source?
- Yes, using a power splitter, you can distribute power from a single source to multiple cameras.
- Do all security cameras come with a power adapter?
- Not all security cameras come with a power adapter. You may need to purchase a compatible adapter separately based on the camera’s specifications.