This article is the 4th one in a series designed to provide an overview of the new menu system available for the Techpro DVRs and NVRs. These menus have been improved in order to make navigating them and operating your recording device easier through the addition of page links on the majority of the menu pages.
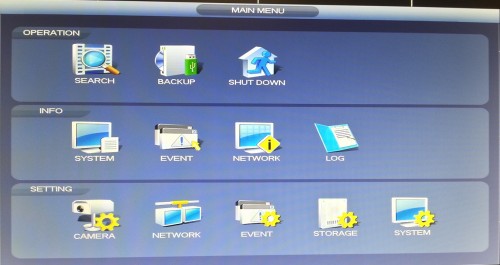
In this article we will continue to take a look at the features offered through the bottom row of the main menu; the SETTINGS menu pages (see Picture 1). The portion of this category that will be covered here includes the EVENT and STORAGE categories, as well as going over some of the more specialized features of the network category. All of these menu pages are critical to setting up your DVR or NVR to record in the manner that you desire. If you have missed the previous articles in this 4 part series, you can read Part 1 of the DVR/NVR menu system here, Part 2 here, and Part 3 here.
Picture 1
TechPro Security Products DVR and NVR Menu – Network
This section of menu pages allows you to configure your recording device so that it will work with your network in the manner that you desire.
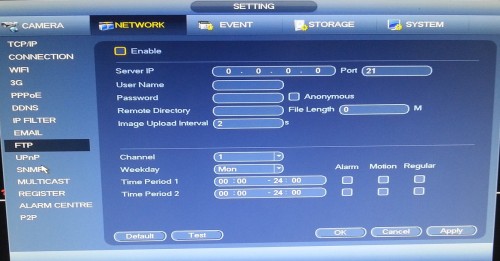
FTP: (see Picture 2)
This menu page will allow you to set up an FTP (File Transfer Protocol). This feature can be used to record your video to a remote location, although this application will require significant bandwidth. This feature can also be used to dump chucks of recorded video to a remote location.
Picture 2
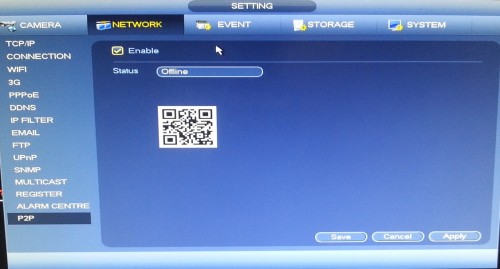
P2P: (see Picture 3)
This menu page will allow you to quickly set up a remote connection between your recording device and the phone app from an Android or Iphone. If this is a feature that you wish to utilize, you should contact our tech support department for assistance in setting this up.
Picture 3
TechPro Security Products DVR and NVR Menu – Event
This section of the SETTING category will allow you to set up how you want your DVR or NVR to respond to certain situations.
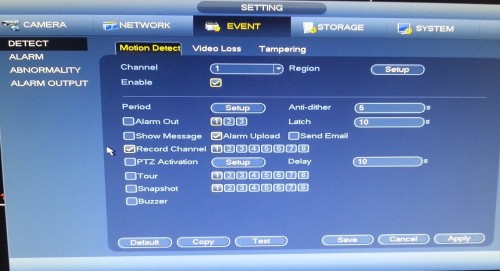
Detect: (see Picture 4.)
Configuring this menu page correctly is a key part of getting motion-based recording to work correctly. To get this set up correctly, it is vital to realize that there is a version of this menu page for each video channel that your recording device can handle. For this reason, you should never make setting changes with ‘ALL’ selected in the channel selection drop down menu or use the ‘Copy’ function on this page.
In order to get motion-based recording set up correctly, you need to make sure that you highlight the enable box (located below the channel selection drop down menu) and the box to the left of the where it says ‘Record Channel’. The numbered box to the right of where it says ‘Recorded Channel’ which matches the channel selected at the top of this page, will also need to be highlighted.
You can make it so that portions of a cameras view will not trigger motion-based recording by clicking on the Setup button to the right of where it says ‘Region’. This same button will also allow you to adjust the sensitivity of the motion detection in up to four separate regions.
The ‘Anti-dither’ setting determines the length of time that motion must occur in front of a camera in order for it to be recognized as a motion event and trigger recording of the video.
The ‘Latch’ setting will let you customize how long the DVR or NVR will continue to record after motion is no longer happening in front of the camera.
Picture 4
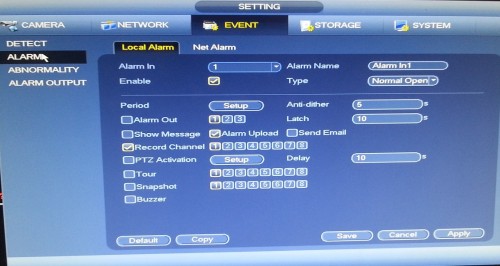
Alarm: (see Picture 5.)
This page of the menu system is where you can customize how the recording device will react to an alarm input.
Picture 5
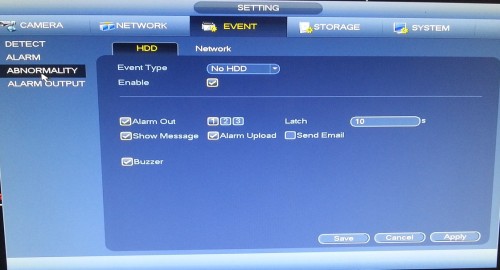
Abnormality: (see Picture 6.)
This menu page will allow you to configure your DVR or NVR to react to certain unusual circumstances that may occur with the recording device. You can get it to notify you of these events in a number of different ways including alarm outputs, emails and a buzzer.
Picture 6
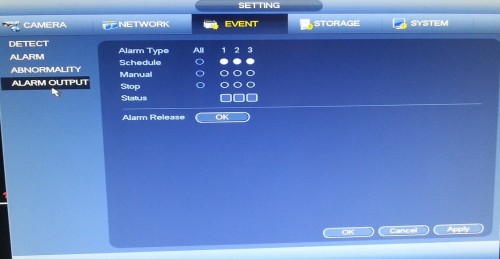
Alarm outputs: (see Picture 7.)
This page of the menu system is where you can customize how the recording device will trigger any alarm outputs which are connected to the back of the unit.
Picture 7
TechPro Security Products DVR and NVR Menu – Storage
This section of the SETTING category of the menu system will allow you to configure any hard drives installed in the DVR or NVR. While hard drives are automatically formatted when the recording device first powers up after the drive is installed, the section of the menu gives you a significant level of customization on how it will operate.
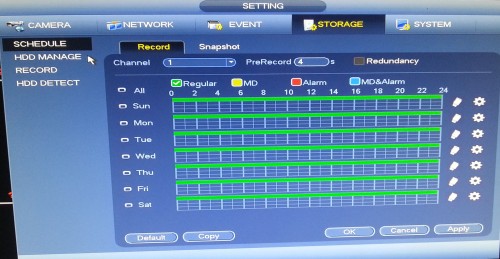
Schedule: (see Picture 8.)
Setting up this menu page correctly plays a key part in configuring your DVR or NVR for either motion-based or continuous recording. This page will allow you to break each day up into different recording types for each camera connected to the recording device.
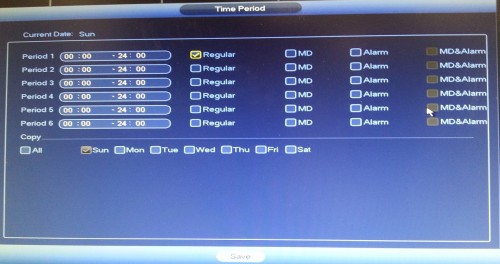
The first thing you should do on this menu page is click on the gear icon to the right of Sunday. Once you’re on this new page you need to select all of the days of the week down toward the bottom of this page (see Picture 9). Period 1 will cover a twenty four hour chunk of time by default, although you can break each day up into six periods for a mix of continuous and motion-based recording. If you wish to utilize different types of recording throughout a day, then change the time that each period covers by clicking in the field. If you decide to use this feature, then you must make sure that the combined periods cover all 24 hours of the day.
The next thing you will need to do is select one of the left two check boxes to the right of period 1. You will select ‘Regular’ if you want to record the video from your cameras continuously. You will need to select ‘MD’ if you want to record based on motion detection. You will need to do this for any additional periods that you customized to break up the day. Once you have made all of the changes on this page that you want, then click on the ‘Save’ button at the bottom of the page. This will lead back on to the SCHEDULE page. Now you can click on the ‘Copy’ button to transfer the setting changes to any of your other channels that you wish.
The PreRecord setting will allow you to customize the amount of time that your recording device will record video prior to a motion event. This setting only pertains to motion based recording.
Once you have everything on this page set up the way you want, you should let the security camera system record for a while and then review your recorded footage in order to ensure that the video from your cameras are recording the way you want. Feel free to contact our tech support team for assistance with this process.
Picture 8
Picture 9

