At SecurityCameraKing.com we offer several models of DVRs in order to be able to meet the budget and security needs of our customers. Although some of the features and video processing capabilities of these recording devices differ, the DVR menu system is very similar in all of them. The advantage of this is that once you learn the DVR menu system from one of them you will already know how to operate any other DVR or NVR that you might purchase from us in the future, with some minor variations. This article is going to help get you familiar with each of the menu pages and their functions.
Once you have a mouse and monitor connected to your DVR the first thing that you should do is cancel the startup wizard. Next you should right click anywhere on the screen and you’ll see a small menu pop up. If you select Main Menu from the bottom of this menu (see Picture 1) and log in, then you will be on the first menu page of your DVR Menu System. This page will have a label along the top that says MAIN MENU and will have six selection icons in the main portion. The selections that you will see at this point are Search, Info, Setting, Advanced, Backup and Shutdown (see Picture 2).
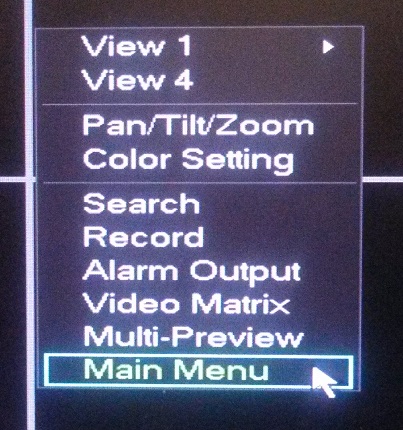
Right Click on Main Menu
What you see in the Main Menu
Search:
This page of the menu will allow you to review the video footage that your DVR has been recording. The first thing that you should do on this page is to select a blue day from the calendar in the upper right corner. These are the days where you have recorded footage stored.
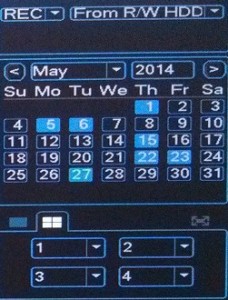
Below the calendar you’ll see some drop down menus with tabs directly above them. The tabs allow you to select how many cameras you will be reviewing at one time. The drop down menus will allow you to select which camera or cameras you will be reviewing.
Calendar and camera selection.
At this point you will see some color show up along the lines at the bottom portion of the page. The colored sections will reflect what time of day that you have recorded footage. Simply click on any part of the colored portion and you will see the recorded footage begin to play.
Search Bar
Info:
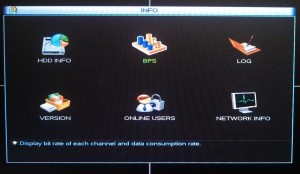
This is where you will find some useful data about the DVR. There are six setting pages here – HDD info, BPS, Log, Version, Online users and Network info.
Info Page
HDD info:
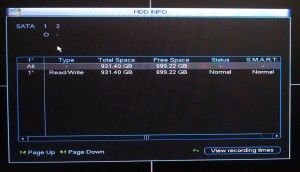
This page shows some important information about any hard drives in your DVR. The total size of the hard drive, how much free space you have remaining, the status and the S.M.A.R.T. report are all shown here. The S.M.A.R.T feature (Self-Monitoring, Analysis and Reporting Technology) monitors the hard drive for signs of possible hard drive malfunctions that may happen in the future.
HDD Info page
BPS:
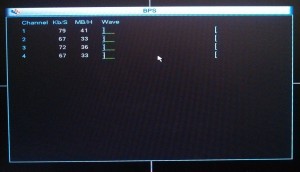
BPS (Bits per second) monitors the bit rates of each camera that is being transmitted with in the DVR.
BPS Page
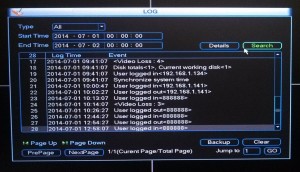
Log:
This page will allow you to search the DVR’s logs based on date, time and the type of the log event.
Log Page
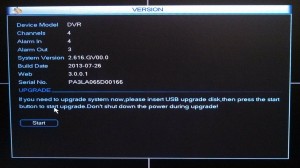
Version:
The information displayed here is about the type of DVR that you have. Most of this data is obvious and you probably already know it. The part of this page that you may need to look up at some point is the system version and the build date. It is also possible to initiate a firmware upgrade from this screen if it becomes necessary. If you do need to do a firmware upgrade you should contact our tech support department with your purchase information.
Version Page
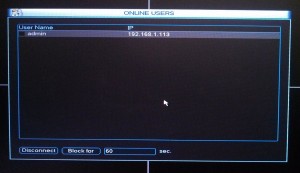
Online users:
This page will show you a list of users which are currently remotely connected to the DVR. The users will be listed by the user name that they logged in with and their IP address. On this page, you also have the ability to disconnect a user and/or block them for a specified time.
Online Users Page
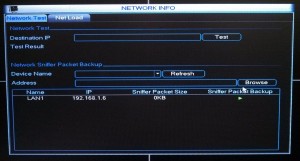
Network info:
The top portion of the network test tab will allow to you make sure that the DVR is connecting to your network by pinging you router’s IP address. The bottom portion of this page is meant to be used by users with advanced networking knowledge. It will allow you to back up a list of packets and through the use of third party software, you can analyze them.
Network Test Tab
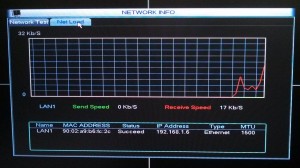
The net load tab will show a live graph of the amount of data that is passing between your DVR and your network. This tab will also show you the MAC address of the DVR.
Net Load Tab
Backup:
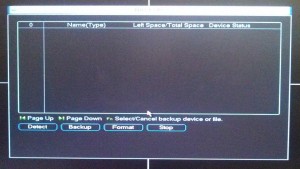
On this page of the menu system you can click on the detect button and it will detect a thumb drive which has been inserted in one of the USB ports of the DVR. After the thumb drive has been detected by the DVR you will see some information about that storage device show up along the top of the page.
Backup Page
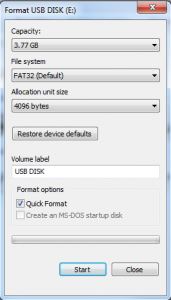
The format button will allow you to format the thumb drive to the FAT32 style format. This type of storage device must be formatted to the FAT32 file system before you can back up your recorded footage to it. You can also do this formatting through a computer by simply plugging it into the computer and locating it on the same page where you can see your hard drive and CD drive. When you are on this page just right click on the thumb drive and you will see the format selection which will begin this process.
Thumb Drive Format
Shutdown:
Logout menu user:
Selecting this option will lock the DVR’s menu system and you will have to log in again before being able to access it again.
Shutdown:
This is the correct way to turn off your DVR.
Restart system:
This is the way that you should reboot the DVR. It’s a good idea to do this after you’ve made a significant amount of setting changes. When you perform this action, you will see the screen indicate that the DVR is saving data.
Switch user:
This option is similar to the Logout menu user option, except that this selection will take you directly to the log in interface. Preforming this action will allow you to make use of the different permissions that each user may have.
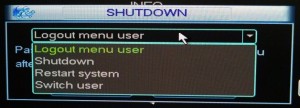
Shutdown menu


