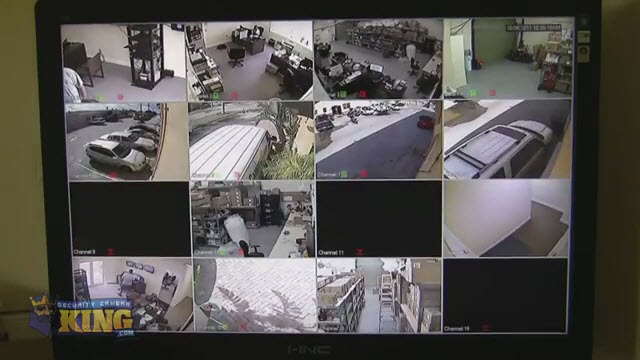
This is a video demonstration of the local interface of all of our DVRs. All of our DVRs share the same interface and the same GUI or Graphical User Interface. So, basically if you know how to use one, you know how to use all. You will find there are different features available on one and not available on the other based on the type of DVR you get from us.
There are several ways to connect to our DVRs. The first method is locally. Local connection can be done using a mouse which is included with the DVR, with a remote control which is also included wit the DVR, or using the buttons on the interface of the faceplate. So those are the three methods of local configuration of the DVRs. The other method is remotely or through the network. Now this can be done from anywhere in the world that you have an Internet or data connection. And it can be done by just about any computer and any mobile device. Basically you can use Internet Explorer, Firefox, Google chrome, Safari, and some of the other browsers out there as long as they accept the Internet explorer plug-in. We also have our free applications for iPhones, iPads, Androids, Blackberries Windows Mobile, and Nokia. Additionally we have our video management software which is enterprise level software and it will allow you to connect to many different DVRs and control them all at one time. You can create groupings of cameras and other useful functions and features.
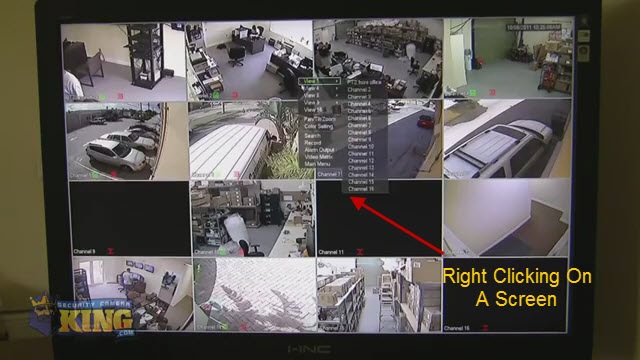
So, in this video I’m going to demonstrate the local interface and it is very easy to use and intuitive and I am using a mouse connected to the USB port. All you have to do is double click on any screen and that will take you to full screen. Additionally you can right click and choose different views.
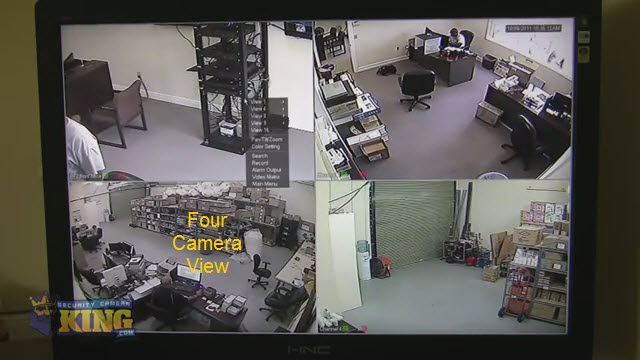
Here’s a 4 camera view:
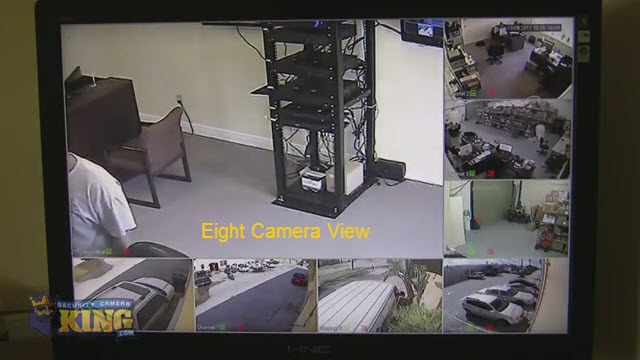
an 8 camera view:
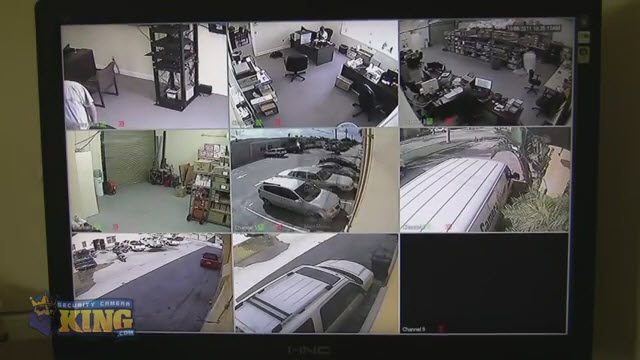
a 9 camera view:
And a 16 camera view:
Also you can digitally zoom in on live video, so if there is something you are looking at and you want to get a little more detail, keep in mind this is a digital zoom, then you can go ahead and choose the area you want to see more detail in and you can blow that up digitally.
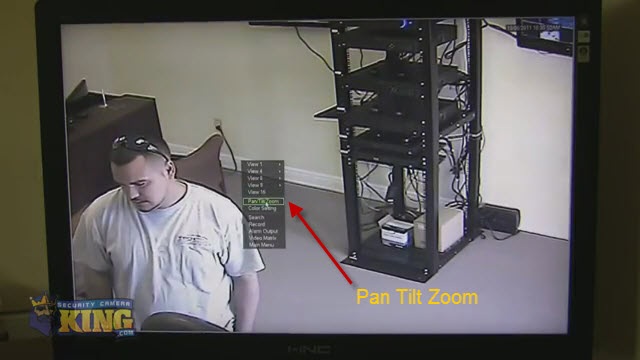
Also as you go through this we can go ahead and control your PTZ or Pan Tilt Zoom cameras that are connected to the DVR. You can do this remotely or locally from the DVR itself. All you have to do is click Pan Tilt Zoom:
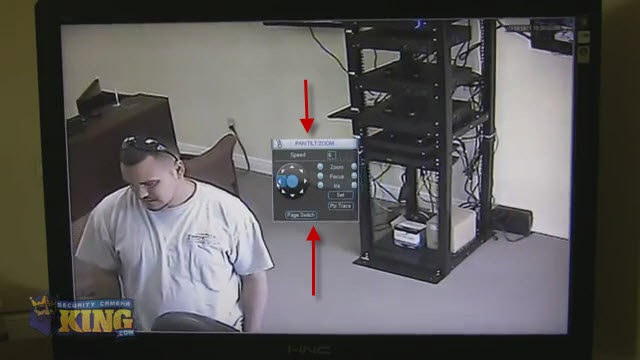
and the Pan Tilt Zoom controller will appear:
And you can just use this to move around zoom in and to zoom out. Very easy. But our DVR has an extra feature when it comes to Pan Tilt Zooms. And that’s the PTZ trace feature. And this is a unique feature to our DVRs/PTZs. Once you click PTZ trace, all you have to do is move your mouse around and the camera will follow wherever you go; to zoom in and zoom out just use the wheel on the mouse. It makes it really easy to interface with the PTZ and it’s a feature that our customers absolutely love.
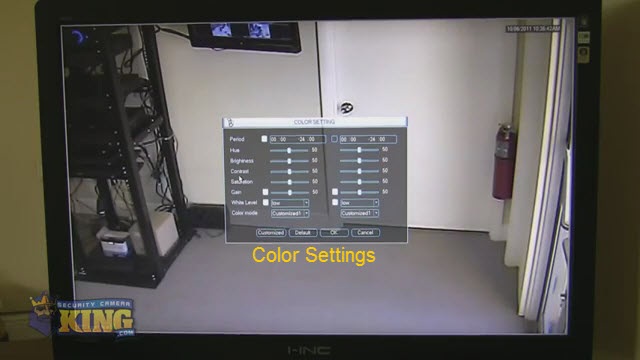
Now we’ll take a look at color settings:
This is another great feature. Each individual camera can have its own color settings. This is really handy at night when you need a little extra brightness or maybe the saturation goes down or the white level goes up, etc. This is a unique feature. You can fine tune every camera individually at the DVR. When you do this it affects the live view and recording both.
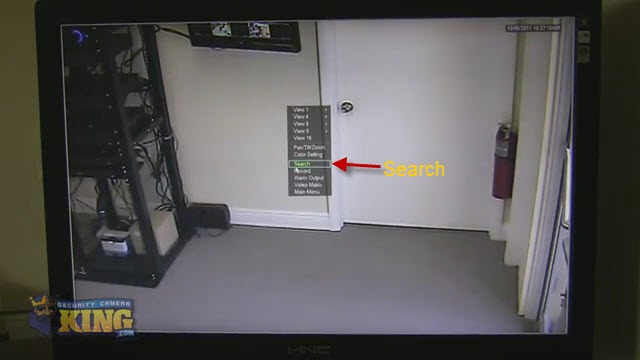
The next feature we’ll take a look at is our search feature:
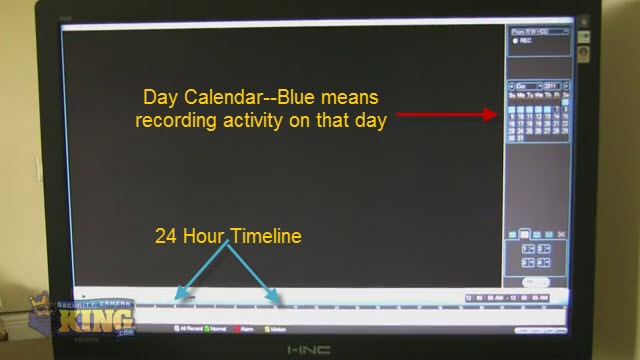
Now our DVR really blows away the competition and this new firmware is not available in the economy series, at least not yet, but all of our other DVRs have this feature available. So Searching for your footage could not be easier. All you do is click the date (blue colored days indicate there are recordings available for those days):
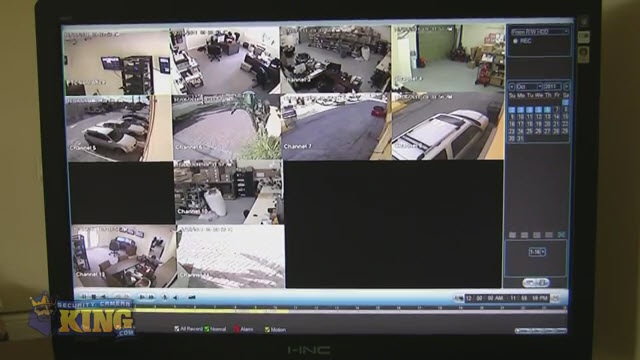
Then go down to the 24 hour timeline at the bottom of the screen, now you can look at 4 cameras, 8 cameras, or 16 cameras all at the same time. Very few DVRs can playback 16 cameras at the same time but ours can. By the way I have this checked for synchronize which means all the cameras are playing back at the same point in time.
Unsynchronized motions will probably not play in synch and will not show motion but in the next time there is motion.
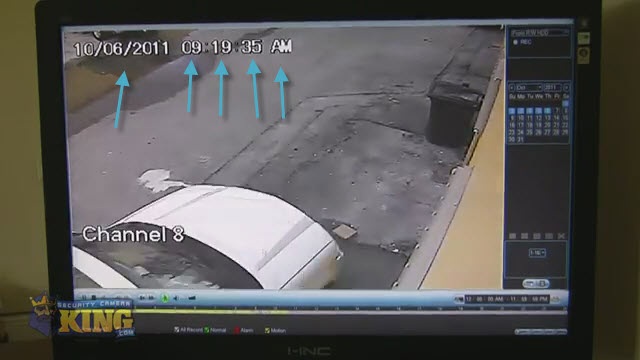
Let’s go ahead and pick a time zone let’s go 9:30ish. Right now we’re playing back all the cameras that have motion going at the same time.
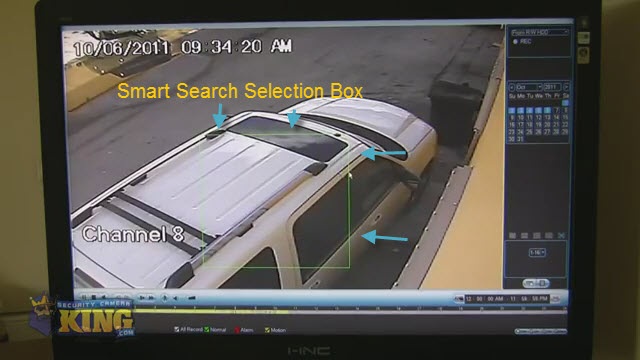
Here’s a feature that blows our competition away. Let’s say someone pulled in and hit something and I want to know what time they actually pulled in. I can do a smart search–I just select a box over the area where the car is:
and the DVR will immediately take you to video where motion occurred in that box.
And I can see that at 9:19AM this car pulled UP. That is a tremendous feature and a time saving feature when it comes to looking for specific events that occur.
Additionally while you are playing back you can actually zoom in and get a closer look at specific areas just by creating a box and then a magnifying glass shows up, just click this and it enlarges the area. Of course you fast forward, rewind, and listen to audio also. Will go into the technical aspects of our DVRs in other videos.
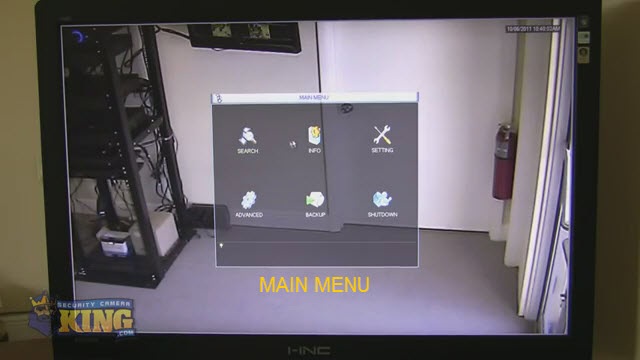
So now we’ll take a look at our main menu.
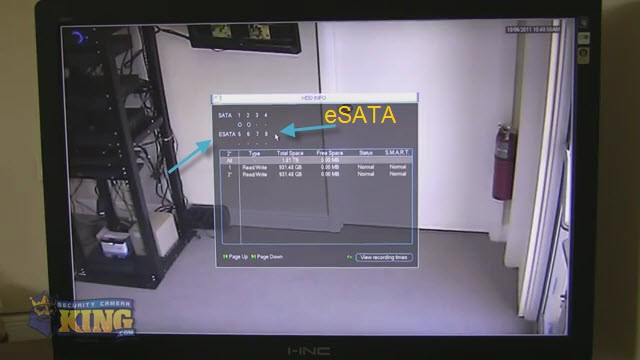
You’ll see search, info, hard drives if connected. By the way our DVRs will hold between, depending on the unit will hold from 1 hard drive up to 3 TB to 8 hard drives internally. But even greater than that, see this eSATA here this means that you can connect an eSATA to this particular DVR (which we do sell these devices):
Our eSATA devices will allow you to add another 4 hardrives for storage. Additionally you can assign your hard drives into groups and you can assign specific cameras to specific hard drives.
Now this works really good with eSATA. Because you could have the DVR record, let’s say your cash register camera to an eSATA device only, and those four hard drives will give you a year of storage for that one camera and you can store that long term on your eSATA device.
Additionally you can see the bit rates that each of your cameras are consuming, you can see the log that will show every event that has occurred in your DVR and you can see what user did caused the event. So make sure you assign usernames to every person that has access to the DVRS so you can see who did what. Also you can see who is remotely logged in and you can block them or disconnect them.
Then you have your settings. You have the general settings like time and date, what to do when your hard drive is full whether you want it to continue writing , first in first out, or whether you want it to stop recording and send you a e-mail or ring a buzzer or some other method.
Then you can choose how long you want people to stay logged in before they are automatically logged out. And your snapshots.
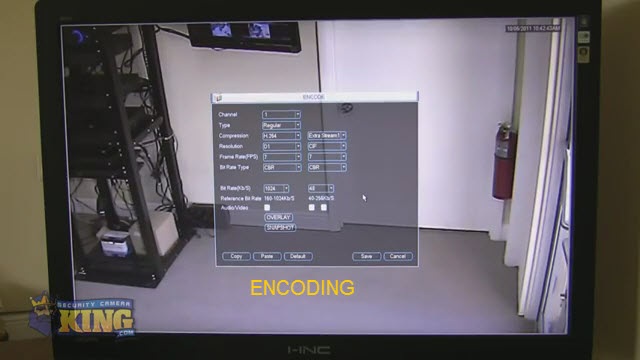
Your next setting is your Encode setting.
Now this setting will allow you to configure each camera individually for your resolution your bit rate, and your sub stream. Now the sub stream is a very important feature. Most DVRS have one single stream for recording, the problem with that it, you often are not able to set up the DVR at the highest available quality settings because when you remote in from outside your network, there is not enough bandwidth to support all of the cameras at the time you do so. And that forces the reduction of quality of all the recordings. And the whole Idea behind recording your cameras is to have the highest quality recording possible Our cameras have the sub stream and what this means is that you can set up the main stream at the highest quality possible, and then your sub stream will be used for remote access from other devices, other computers, your iPhone, iPad, Android, etc. You can set up the sub stream at a lower bit rate lower resolution and lower frame rate so that it will allow you to access all of your cameras at one time. This is a great feature.
Additionally here you would select whether you wanted to monitor audio from outside or not.
Now will take a look at your schedule. Here you can set up a schedule for each individual camera. You can tell it what you want it to do; motion recording, regular recordings, what times of the day and what days of the week you want it to do so. Also our DVRs can do both regular recording and motion recording at the same time. So you could set up 24 hour a day seven day recording at let’s say a lower resolution at 1 or 2 frames per second and then when motion occurs you could have it record at the highest resolution and at a higher frame rate and that will help to conserve storage on your hard drive.
So there are some really neat settings here. Then you have your network settings. This is where you enter you IP address, your port numbers, etc.
Now one of the new features available on all but our Economy series DVRs, is UPnP. Basically this will allow for automatic port forwarding if you have a UPnP capable device. Most of the new routers out there are now UPnP capable. So if your not sure about how to forward ports and open ports and so on, you can have it doe it automatically for you.
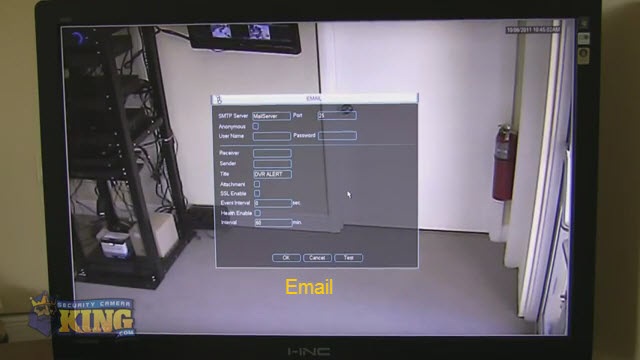
It will also set up your e-mail server here, because this DVR will email you if you so desire, when events occur.
It can email you with a snapshot or without a snapshot. So you could be out and someone could walk in your front door and if you have it configured for motion detection it could than email you a snapshot of the person who walked in your front door to your cell phone or computer. Also it can email you when there are problems with the unit, like when your hard drive is full or when other events occur.
Your alarm settings. You have alarm inputs and alarm outputs on your DVR. You can use this to control all kinds of devices and to set off all kinds of devices. For example you could hook up a buzzer alarm access control door to your DVR. You can have it on the alarm input that it will automatically trigger a PTZ,, Pan Tilt Zoom camera, to swing in and cover the door to give you extra detail. Or you could set it up to when there is motion at a specific motion detector that is connected to your DVR that it will email you a snapshot of that motion event. There are so many different uses for this we’ve had so many conversations with customers of all the different ways they have used these alarm inputs and alarm outputs.
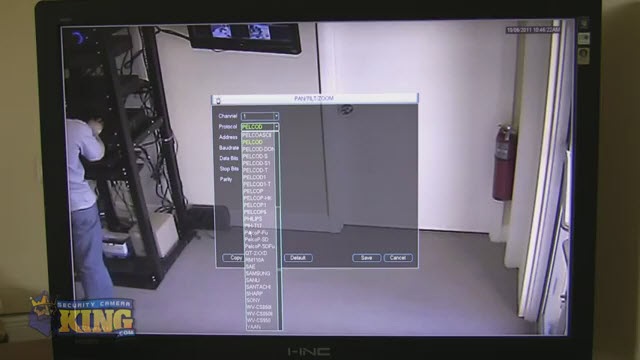
Your Pan Tilt Zoom settings. Our DVRs will work with almost any PTZ on the market. As you can see here these are all the different protocols that our DVR will accept.
Then you have your display settings. Now our DVRs, except for the Economy version, have HDMI video output that you can connect to a HDMI monitor and that’s 1080p video, then you have your VGA output which will connect with any VGA monitor, and than you have a BNC output could be used to connect let’s a say a TV. All three of these can be used at the same times so you can have three separate main monitors connected to your DVR all active at the same time. In addition to that we have a matrix. Now the matrix is a really neat setting because the matrix will allow you to set up a spot monitor let’s say a monitor in your ware house that monitors the front door and the parking lot it will sequence out those cameras designated for the matrix.
Back to the main menu advanced settings. You could manage all of your hard drives here. Again we accept eSATA devices. Really great features here. Abnormality; you can have the DVR email you or set off an alarm or do different alarm outputs for you when there is a disk error, no space, or the Internet disconnects, a conflicted IP address or MAC address problem.
Moving on you have your alarm output controls. These can be used for any device to use as normally open and normally closed. There are thousands of devices out there that this can be connected to.
Then you have your account set up. Here you can set up multiple users. As many users as you want with their own user name and passwords with access rights to different cameras and different configurations. Some could be allowed to control PTZs other won’t. Some can have access to certain cameras and others not. Your maintenance will allow you to reboot your DVR on a regular basis. We normally recommend rebooting it at least once a week. And you can tell it whether you want to delete old files on your hard drive or not. And you can customize, you could say I want 30 days worth of storage than I want to erase all the data and start fresh.
Our full size units, the Elites, the Ultimates , and our Hybrids have the ability to connect with your POS system. What this means is that you can actually have your POS overlaid text on our video so that you can actually search for video based on events that happen on your Point of Sale device. You can search by credit card numbers, by transaction times, by SKU number. So again a lot of great features here that discuss all of this in detail.
Then you have your backup allowing you to back up to different devices. So that’s a brief overview of our DVRs I hope you found it informational as you can see our DVRs are truly the most advance DVRs in the market place today and on top of that our tech support is truly topnotch. We have English and Spanish speaking tech support agents here to help you. And we offer full tech support during business ours Monday through Friday. Thank you for watching I hope you found this to be informational.

