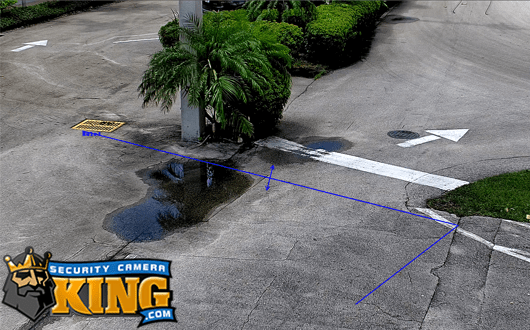
There are many ways to utilize IP cameras. One great way is for HD Time Lapse Videos as they provide Megapixel resolution with stunning images such as the one above. I just recently received a forum request to integrate software with our IP cameras and pull snapshots onto the software which uploads the files into an FTP server which will then be displayed onto a webpage.
Our Goal is to display an image as well as a video such as this one here.
Lets start with the Hardware and software we will be needing for this task.
- IP camera
- PC on the same network as the Camera.
- IPTIMELAPSE by SEBSECTEC.com [optional]
- Router [Connected to the Internet]
- Webpage 😉
Identifying your Network camera’s IP address:
If you forgot the IP address it can be a little confusing. Normally our cameras are set to 192.168.1.108 but in occasions where you may have multiple cameras or simply have a different IP scheme such as 10.1.1.1 you will end up having to search and see what your cameras are set to. You can use this software here which will scan your network for any cameras running that are Onvif. It is simple to use. Just launch the application after installing the software and it will display all of your cameras in the network. Of course this will not work if you have an NVR with a Built in PoE switch as the built-in switch will keep the cameras attached to it separate from your local network. After identifying the cameras IP address we can move on to the Software that we will be utilized to create the images and upload them to the FTP server.
Software vs. FTP upload from IP camera [Differences]
The software that I am utilizing is IPTIMELAPSE by SEBSECTEC.com. It is a paid software but there is a trial you can utilize to test the software. The software itself is great if you want to create time-lapse videos or upload still images onto a webpage as it does this by uploading the files using a File Transfer Protocol “FTP” and keeps the file names correct so that it may be correctly coded into the webpage. Now if we utilize the File Transfer Protocol on the Network Camera it will create a file with different file names and folders and this is not best when creating your code for your webpage. This is why we will be using the software that does most of the hard work.
Lets start configuring and learning how to setup the software.
In the image above we are in the “View” tab. Insert the following address
http://192.168.1.82:9989/onvif/media_service/snapshot
192.168.1.82 is my cameras IP address make sure to add the correct address.
We are using the Onvif port which is 9989 and we are calling to view the Snapshot feature of the camera by navigating to the Snapshot service.
Since we are using the Onvif port of this camera we are not required to input the cameras credentials. So, we leave the check box for “Use Login” unchecked. IP camera is checked and “Generic” is utilized. Once you have done this make sure the Display on check box is on and click on the “Take Picture” this will display an image. Once we have confirmed that the connection is established click on “Save Settings”.
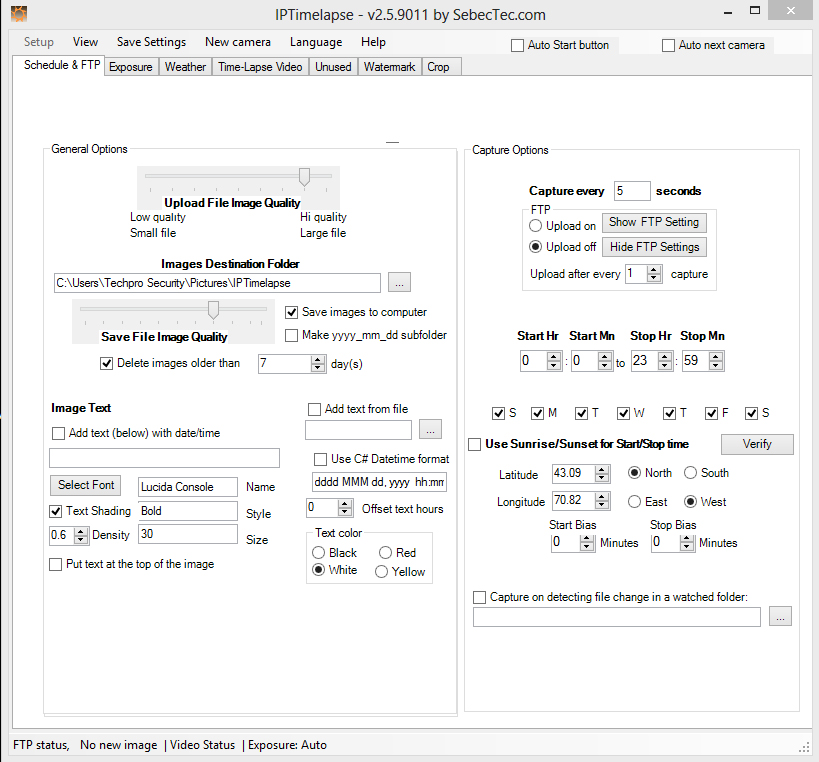
In this Image you can see the Schedule and FTP settings In the General Options you can select the Image quality. In my case I have it pointed to a local folder in my PC.
You can set here the FTP settings as well as the capture rate, make sure the Credentials are correct for your FTP server.
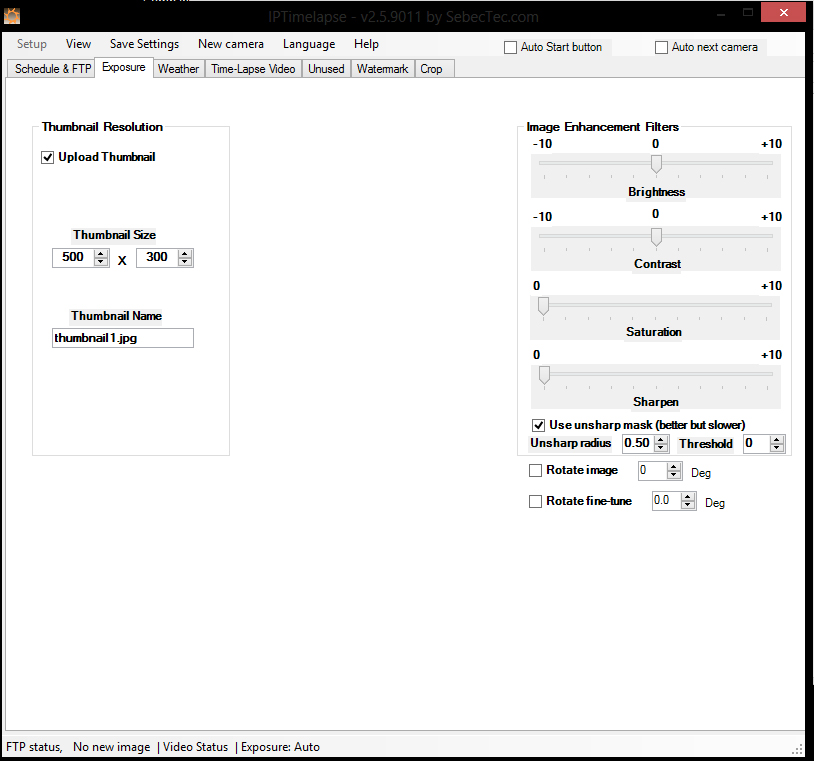
Here is where you will name the file you will be using on your HTML code and JavaScript. I left mine set to default as you can see in the image.
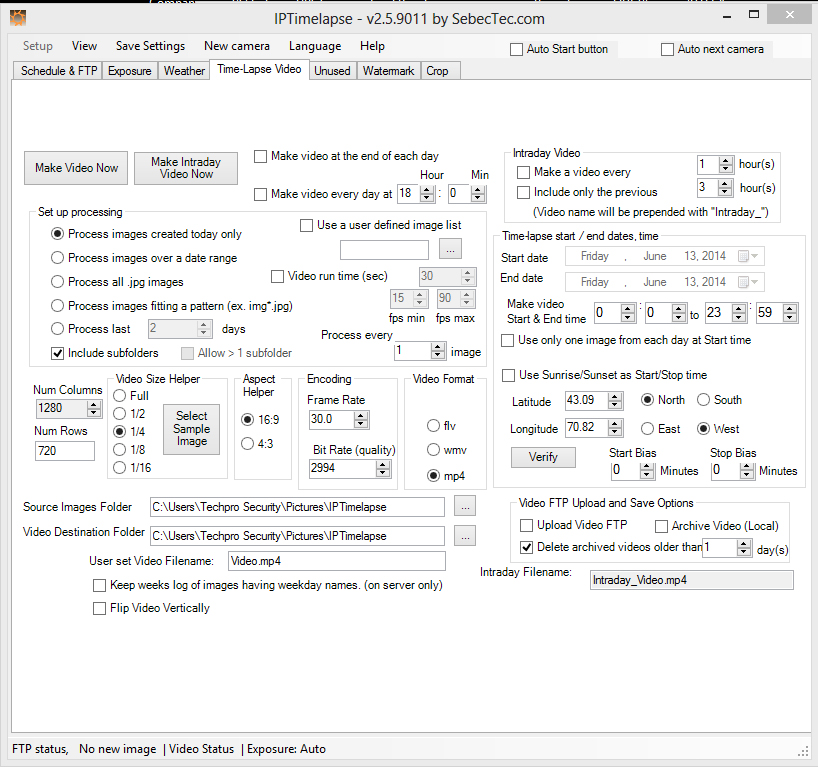
Here you can select the settings for your Time lapse video if you wish to upload one . You can select to push a video at a certain time and from a certain day or in general.
The video shown here was taken from an IPOD-EL1MPIR50 camera set to take snapshots at 5 second intervals. It was not the best position but it makes a good example of what can be achieved with the software.
Once you have set the software to upload the images and take the snapshots to whatever you want, in my case I chose 5 seconds and the video above was encoded to 30FPS [Frames per second]. This is why the video looks fast. A better setting would have been 30 second snapshot with 30 fps I did not have a lot of time so I chose a quicker method.
In this video you can see how the software uploads the files and keeps 2 files with the same name. One is named snapshot0 and the other one is titled thumb0, these are both JPG image files. In the code we will be focusing on thumb0 since this is the current and most up to date image and snapshot is the file the was once the current file.
Lets break this down so anyone can understand what is going on here. JavaScript is browser side handled so the browser runs the script .
The Script starts by identifying that the following code is JavaScript.
<script type = “text/javascript”>
There is a function called “refresh” this is what will be called in the html code to run the script.
function refresh() {
The next Variable states the interval time for now the “5” stands for 5 seconds this can be changes to suit your needs.
var refreshTime = 5*1000; //5000ms
The next Variable states what image or element the script will be focusing on in my case it is default which is thumb0.jpg.
var thisImage = “thumb0.jpg”;
The next variable adds a time stamp to the file so that it can identify the image and ignore the file if the file has not been changed it will not execute the ‘Refresh” function.
var today = new Date();
The next line of code is part of the verifying if the file has changed at all.
document.images[“pic”].src=thisImage+”?”+today;
The next line of code sets a time out which waits to run the script once more , this will continue over and over until the user viewing the webpage either navigates to another page or closes their browser.
t=setTimeout(‘refresh()’, refreshTime);
After the script there is HTML code that is for the title as well as for displaying the image which is thumb0.jpg as well as calling the script to start in the body of the html code. Now I have added a link to where you can view the time-lapse video this will only work if you set the software to create a time-lapse video and push it out to the FTP server i have comment this out so it will not work , you can remove the comment tags <!–…–> to turn it on also make sure to use the correct file type when adding the video link i have mine set to .mp4 you can select either .flv and .wmv. Once you have completed coding this into your webpage you should be done.


