Help my camera is dead and I don’t know what to do!!!! Relax the Camera is not going to cause a cascading failure and blow up the whole system or burn the house down. You will need a multi meter to verify voltages and amps. Depending on where your cameras are located is how you may want to proceed. If the cameras are easy to get to the first thing I would do is break out a ladder if needed and get up to the camera.
If your camera has IR or infrared cup your hand around the camera to trick the sensor so it thinks it is night then see if the IRs do come on. If they do good, I know the camera is getting power. I would still test power output regardless if IRs comes on. The infrared does not need much to power up so there could still be an issue. If this camera is a DC then you should get at or above 12 volts DC. Should the camera be AC the reading should be at or above 24 volts AC. 11.7 volts is close but not enough 23.9 volts is close but not enough. The voltage must be at or above the required amount. It has been my experience that “almost” in voltage needed is not enough. Almost only counts in horse shoes and hand grenades. The camera may give you a video feed during day but as soon as the Infra-Red led come on the camera will act very strange, or the camera will act strange to begin with.
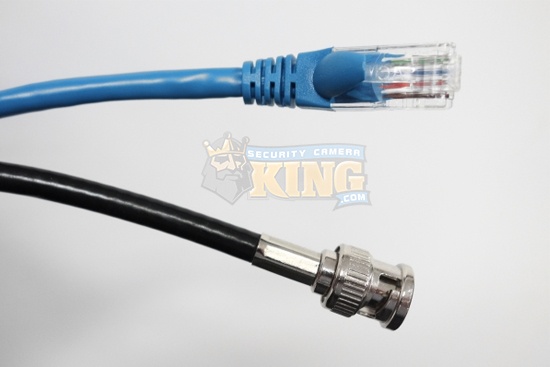
Now at this point let us say you have less than required or no power at the camera. You now need to go to your power supply to test it also taking the camera down at this point is advisable. Check the connections on the coax cable. Twist on BNC connectors is convenient but they do get loose if they move or shake for whatever reason they will make the camera have grainy or lines or a waviness to the image produced. BNC Twists are an unreliable connection. I like them for bench testing since they are so convenient. For installation I avoid them if I can. In the early days of computing there was a phenomena called chip creep. Ram chips would get hot and cold and slowly work themselves out of the slot on mother board. It is logical that the same would happen with the twists over time.
Crimp on BNC connectors and compression fittings are the best. Some people will swear by crimp on BNC other people will swear by compression BNC. In either case they typically do not become loose preventing video loss or poor images. For both types of connectors you need the specified tool to install the ends. Pliers will not get the job done they will only create a problem.
Now that we have the camera in question down it is time to go back to the power supply and do some testing. Check output on the channel of the power supply is do you get 12vdc or 24vac. If we get the full output needed at power supply connect camera directly to power supply and DVR. Does the issue go away in day and night mode? If it does then you now know something is going on the cable. If not we know for sure the camera is not operating correctly. This could be from any number of reasons. To prevent the cameras from going bad a surge protector is always recommended. If you can get a battery backup and conditioner, the conditioner cleans up feedback or interference on the power side that can cause cameras to act very strange.
For cable issues there several ways to go about determining what to do next. First is how long of a cable run do you have? Coax cables have limitations on distance. The common cable RG59 which most people use for CCTV has the highest attenuation or signal loss. It is never recommended to use RG59 above a distance of 1000 feet. Some people do not recommend to use RG59 over 750 feet. Having a cable that has an impedance of 75 ohms is crucial. If the impedance is outside of that you will get more signal loss. If you are using RG6 this coax cable has lower attenuation so you can get more distance before running into problems. Normally you can get up to 1500 feet. RG6 is recommended for use between 1000 – 1500 feet. As there is a price difference I would not use RG6 unless distance required it. RG11 is the thickest of the cables used. It does have the lowest attenuation of all coax cable. You can get up to 2000 feet on a home run. With all cable bending and pulling cable can and will damage the cable. Using a lubricant helps in preventing damage from pulling. When it comes to bending any cable you cannot bend, twist, or roll up cable tighter that the radius of the cable itself. If you do, get a new piece of cable because you just damaged that cable. The cable may work but the longer the run the more likely you will have a bad video feed. Once you bend the cable that far you put a kink in the wire and add to the resistance. Another issue I have seen is failure to ensure there are no jagged edges for the cable to get caught on or sliced into. For example running cable in an attic there are old rusty nails and screws everywhere. If a screw gets in contact with cable you can inadvertently add an extra ground the “POOF” no more video or you get static if you’re lucky. Sometimes it just is not possible to measure resistance on a cable run end to end that is why I say take the camera down so we can isolate the issue.
With the steps I have outlined you should be able to troubleshoot your system when issues arise. I can tell you that most issues in CCTV arise from to long of cable runs with the wrong cable type. Power is especially problematic as the thinner the wire the higher the voltage drop at distance.


