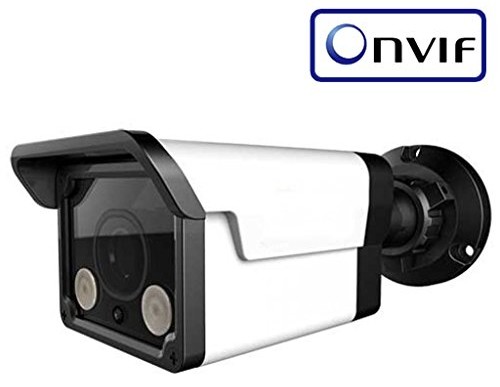
In this article I will teach you on how to set up your ELI Series network IP cameras. The ELI cameras are a great value for the money and produce a great video image. They are a little tricky to set up since they are ONVIF cameras and that’s why this article will be very useful to you. Much as ELI cameras are fully compatible with our NVRs, remember that ONVIF cameras will not have full functionality with an NVR from a different manufacturer. Unlike our EL series cameras the ELI series cameras by default are not plug n’ play cameras and it’s important to remember that. That’s why it is very important to plan your installation and purchases, in that order.
First, you have to know your hardware since there are a few ways to set up any network camera.
The Simple Way
The simplest way to connect a camera to your network is to connect it to your router and power it with a 12v DC power supply. This method saves you the need for additional devices on the network, and it will suit you if you only have a few cameras to connect. Remember that the down side is that you have to plan thoroughly on how to power each camera.
Using an External POE Switch
Another way is to use an external POE switch that will be connected to your existing network, will provide a network connection, and provide power to your cameras. This method is great if you are planning to have multiple cameras on your network. This is the way that is preferable by me personally since after the setup, you have access to any camera on the network which makes it much easier to access and configure each camera. The downside of this method is the cost of an external POE switch.
Built-in POE switch
The use of a built-in POE switch in an NVR simplifies the connection of your cameras since it separates your cameras from your network. It means that the built-in POE switch creates its own network environment that will work on a completely different IP scheme. Usually the default IP for the built-in POE is 10.1.1.1. The advantage of such a setup is that since the cameras are separated from your main network, your network is not affected by your cameras.
On the other hand, it means that the cameras will not be accessible from your main network and need to be configured before you plug them into the built-in POE switch in the back of your NVR.
The 2 first ways are easier for the end-user since the customer can get help by our Techpro Security support department. If the customer will give us access to their computer, we can easily access any of the cameras and help set up and configure the installation. The tricky part is with the third way since, as I mentioned, the cameras are not accessible from the main network and the customer we work with has to assist us by plugging the cameras to the main network for configuration and then back to the built-in POE switch. The most absolutely necessary tool in this case is a 12v DC power supply which is a must-have when temporarily connecting a camera to the main network.
Now we get to the business! How do I connect and configure an ELI network camera?
First, you need to download the entire contents of this folder from this link: https://app.box.com/s/d5lib16z51aj8zy80uhagpdeb87opsne
The package will include: Update Tool, IP Search tool, firmware file, instructions, and capture screen pictures.
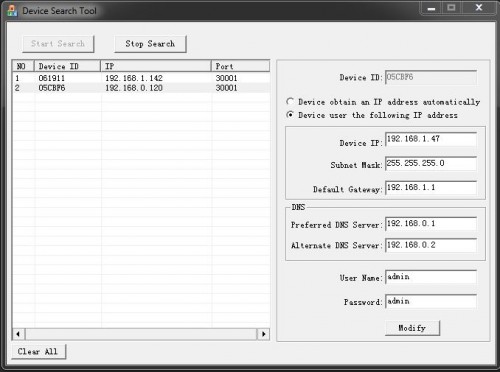
- Please connect the camera to your network (your router) and power it with a 12V DC power supply. Remember! If you have multiple cameras always plug-in and configure one by one otherwise you will have an IP conflict since all your cameras come with a default IP address of 192.168.0.120
 /center>
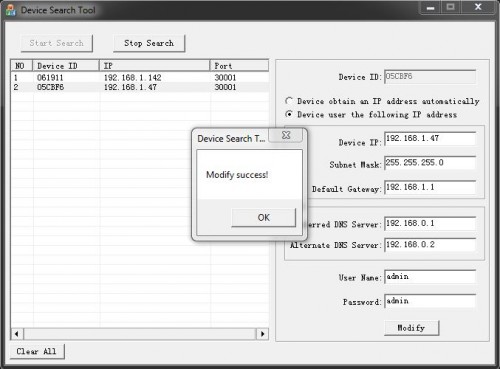
- Go ahead and run your IP Search tool. When the software opens, click the ‘Start Search’ button and wait until the camera shows up. Click the camera that shows up and change the Device IP to the IP of your choice. For demo purpose I gave mine: 192.168.1.47 You also need to change the Default Gateway 192.168.1.1
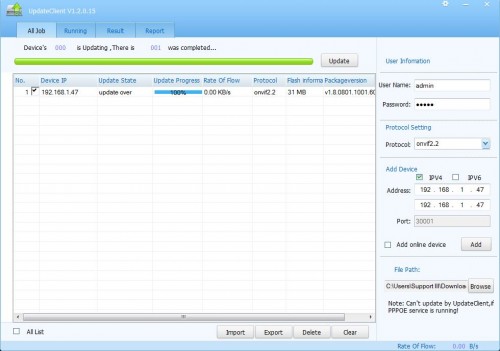
- Go ahead and run the Sunel update tool. When the software opens, put the address of your camera into the Address field and click ‘Add’. After the camera shows up, wait until the Update State will show ‘connect success’ and click ‘Browse’. Find your downloaded Eline folder and choose the firmware file. Last thing, uncheck the ‘Add online device’ box and click ‘Update’.
- It will take a few minutes to update your firmware. Update State will show ‘updating’ and the update process will begin. At the end of the process Update Progress will show 100% and the status bar should turn green. This will give you the indication that the process is complete.
After the update process, you can turn your camera into plug n’ play. There is only one more thing you need to do to make it happen. You need to run the IP Search tool again, choose the camera and check in the box for ‘Device obtain an IP address automatically’. That will turn on the DHCP and find the IP address automatically. There are additional settings you need to change so the camera will detect motion with our NVRs. Go ahead and log into the camera using your internet browser. The user/password are default admin/admin.
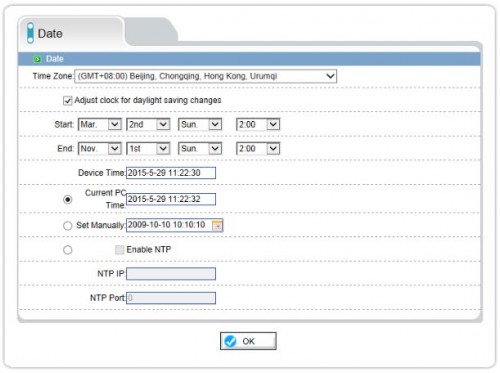
- Under ‘Device Configuration’ check the box ‘Adjust clock for daylight savings changes’ and fill in the Start and the End for DTS. The time zone should remain on +08:00. Hit OK.
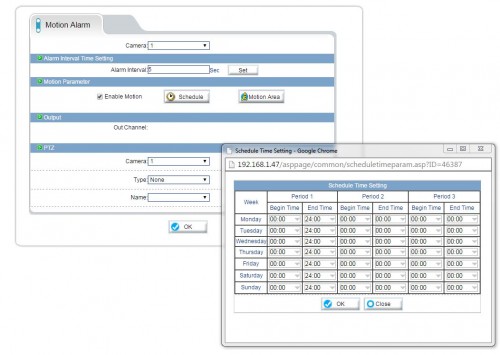
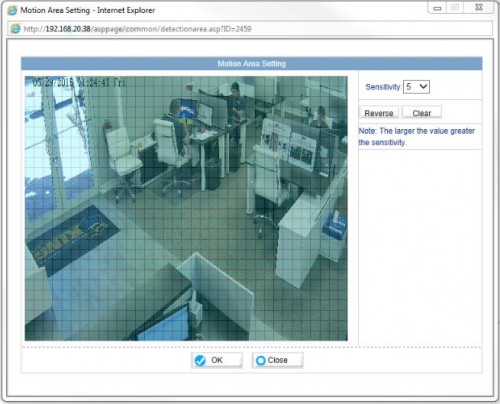
- Under ‘Alarm Configuration’ click on ‘Motion Alarm’ and change the interval to 5 sec, hit ‘Set’ Check box for ‘Enable Motion’ and click ‘Schedule’. Under Period 1, end time should be changed to 24:00 at all fields. Hit OK. Click on ‘Motion Area’ and mark by dragging the whole visible image. The whole image should turn blue. Hit OK.
You are done! Now you have to do the same process with the rest of your cameras. If for any reason you were unable to complete the task, please feel free to call us at 866-573-8878 and hit option 3 for tech support. You can also visit our CCTV Camera Forum for additional support after hours.
