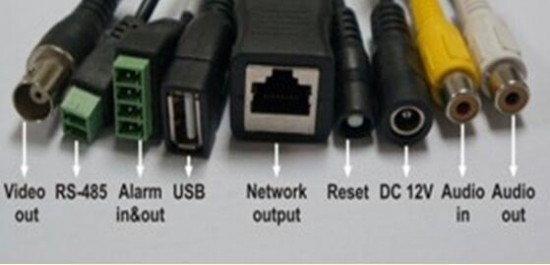
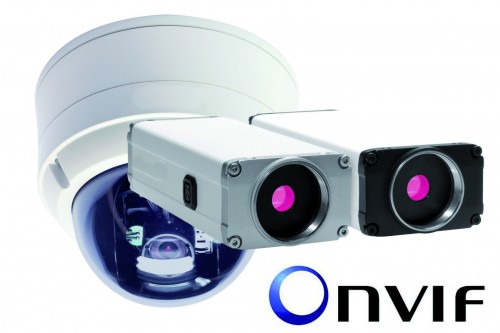
A few of our customers showed interest of connecting a standalone IP camera without using an NVR. There are a few reasons to do so. Mainly customers don’t want an over-sophisticated surveillance system, but would prefer a solution using one or two cameras. It is not hard to do since all the cameras that we sell support a standalone operation. Each camera can operate individually as a CCTV system. The downside is that some cameras do not have all the features that the NVR has, and some cameras are just designed to work with an NVR and not as a standalone. For example, some of our EL series cameras can work as standalone but do not have storage to record the video footage. But, now I want to talk about our ONVIF IP cameras that have multiple features which makes them a perfect candidate for a standalone CCTV camera. The ONVIF IP cameras are a little tricky to set up when working with an NVR since ONVIF is a standard that is not fully supported by surveillance systems manufacturers. But, it makes that camera a great choice when a standalone setup is desired. Our ONVIF cameras can hold an SD card which will store your recorded footage, and our TP series ONVIF IP cameras have a pigtail with multiple inputs that will open a lot of options of a standalone security camera.

The most desired feature of any CCTV system is to remote access your system from a distant location so you can view your cameras. I am going to teach you how to do it with 2 of our camera types: TP series cameras and eLine series cameras. Remember, that this type of connection is very limited and I will always recommend having an NVR with cameras connected to it rather than having a standalone camera.
TP series ONVIF IP camera remote access setup
When you connect the TP camera to a network, the camera’s default IP address is 192.168.1.2. You need to use our TP tool to find the camera on the network (the TP Series IP Camera Search tool can be downloaded for free from our website here) and then give it a static IP address.

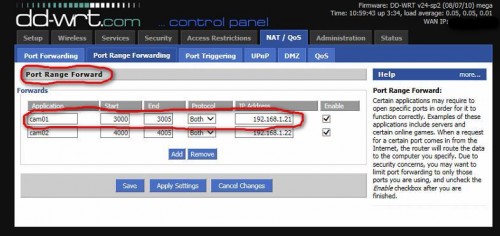
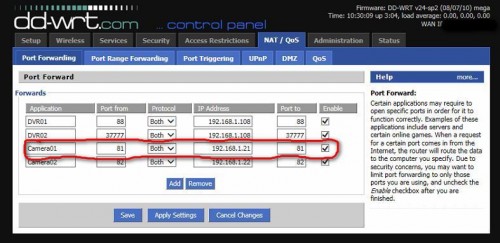
Use Internet Explorer and type the IP address of the camera into the address bar. Make sure that all of the ActiveX controls are installed correctly so you can view the web-interface properly. If you are having issues with fonts, language display, or any type of display errors, you will have to reinstall the ActiveX controls. The next step is to forward or open 2 ports on your gateway so your camera will be accessible from outside your network. We have to go to your gateway to the Internet which can be your router or modem and login into the interface of that device. Go into the advanced settings of the router and find ‘Port Forwarding’. You need to forward 2 ports, an HTTP port and Server Port. The default HTTP port is 80 and it is not recommended for use since some internet providers block port 80. Use the TP tool and change the HTTP port from 80 to any other port, for example we will use port 82. Forward the port 82 for the IP of your NVR and forward a port range from 3000-3005 for the server port.


Next stage is to go to a the website http://www.canyouseeme.org and see what your external IP is. You are done! To access your camera remotely you will type the following address in any computer running Internet Explorer: http://xxx.xxx.xxx.xxx:82/ (the x represent your external IP address).
eLine ONVIF IP camera remote access setup
The process for setting up the remote access for the eLine cameras is very similar to the previous setup. Instead of the TP tool, you will need to download an eLine IP search tool that is also available for a free download from our website. The ports that you need to forward on your router are also different. The 2 ports will be the HTTP port (that is also recommended for change from 80) and the server port which is 30001. The big advantage of the eLine cameras over the TP series cameras is that the mobile app is available for download from a Google Play store or Apple App store. The name of the app is eLine SIP Viewer, and you can use it to access your camera from any Smart phone or tablet.
Additional great features of the standalone ONVIF IP cams
Audio: Another great advantage of the TP series ONVIF IP cameras is that they have an audio input at the camera pigtail. With this option you have the possibility to attach a microphone and record an audio that comes in from a scene that you are viewing.
Storage: As I mentioned before, all of our ONVIF IP cameras have some kind of storage option such as a USB flash drive in or SD card slot. That way all the video can be viewed as well as recorded.
Alarm input/outputs: An option to integrate your alarm system into your camera and use it as a recording device when the alarm is triggered.
Motion: The cameras are capable of detecting motion and trigger a recording when that motion happens. There is an option to mask any undesired area for motion and create a few zones for motion.
Multiple standalone cameras
There is also an option to connect multiple standalone cameras which will work as individual units independently and this is also possible but you have to remember a few details. Remember to power one camera at a time and change the default IP address, so the default IPs of the cameras won’t conflict. Also the HTTP and the Server ports have to be different between the cameras. This is a necessity so you can remotely access a certain camera.

Conclusion
The standalone ONVIF IP camera might be a good solution for you but you have to remember all the disadvantages of not having an NVR unit. My opinion is that if you want to run more than one camera, go ahead and purchase an NVR that will manage your multiple cameras, it makes your life so much easier.
