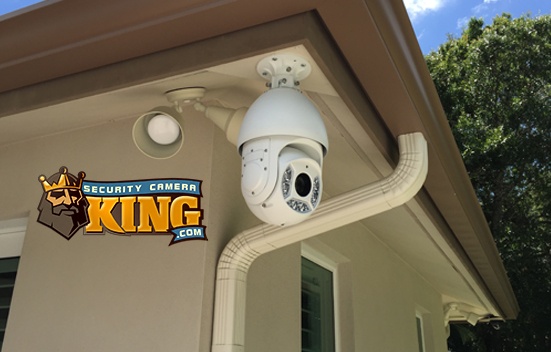
Right off the bat, when you here PTZ, you automatically think Pan, Tilt, Zoom. Here at www.securitycameraking.com we have plenty of options when it comes to PTZs. This month I will be focusing on one of our PTZs in particular, the PTZ-LX700L12X-E. This 700TVL Security Camera is a great choice for a CCTV analog system. The thing I like most about this PTZ cameras is that it is cost-effect as compared to some of the higher end PTZs that we sell. This is a very popular camera and is very easy to install and use. In this article I will explain how to connect a PTZ to a DVR and access the settings.
PTZ Wiring, the do’s and don’ts!
Once the product has been shipped to your address and arrived, you will be eager to get it hooked up and functioning. Let me start off by showing you what you will be dealing with here to make this possible.
- The pigtail of the PTZ will look like the picture below.
- This pigtail is where you will hook your Siamese Cable. 12V DC power is the first connector in line, then there is the BNC video in the middle (which is where you will run your RG59 cabling from this connector to any video input on the back of your DVR), then the last two little cables on the bottom are the RS-485 connections.
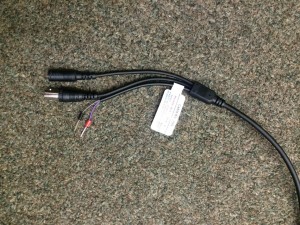
The RS-485 is the connection you will need from the PTZ to the back of the DVR. This allows you to access the OSD (On Screen Display) at the DVR. This gives you the access to Pan, Tilt, and Zoom functions. My recommendation for wiring this connection would be 18/2. This is a thick enough gauge cable that you could run over 150 feet from the PTZ to the DVR and still access the OSD at the DVR (or from any computer or smart device). Now, the Purple wire with the red tip will be your positive, and the grey wire with the black tip will be your negative.
The connection at the back of the DVR will look like the picture below. Now, the wire used in this picture is a smaller gauge than 18/2, because this DVR is on a test bench where a camera never needs to be farther than 3’ from the DVR. Don’t worry, the connections are the same. At the back of your DVR you will find a terminal connection that looks like this one. As shown in the picture, the “A” is positive, and the “B” is negative.
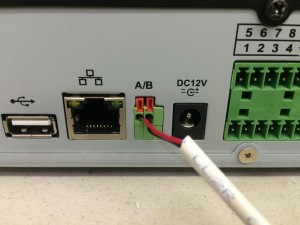
The other end of the wire should look like the picture below, just a simple positive and negative wire.
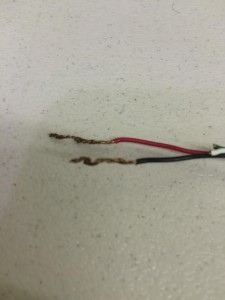
Again, the cable is not 18/2 but works just the same. Then all that needs to be done is to connect the positive wire of the 18/2 (Thats not already connected to the DVR) to the positive wire of the RS-485 on the PTZ (The Purple Wire with the Red tip). Now do the same thing with the negative connections, black 18/2 wire to Grey RS-485 wire.
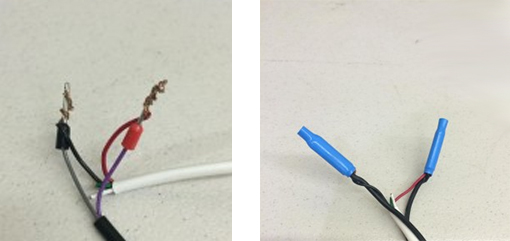
The end result should look something like the 2 pictures below. The picture on the right is a much cleaner way of connecting wires using Beanie connectors. This way, the wires will not come apart as they might in the picture on the left.
Before you make any final connections, however, you might want to temporarily connect the wires with alligator clips as shown below for testing purposes to make sure you can access the OSD and PTZ controls.
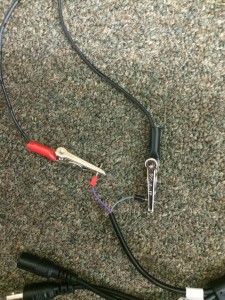
At this point, given all the connections are made correctly you should have access to the OSD at the DVR. Before we jump into accessing the OSD let’s make sure you have video and power. 12V power should be plugged into an outlet and the camera. Once this connection is made the camera will begin to pan, tilt, and zoom as a setup feature, making sure the camera can operate properly. The video will be connected through BNC. One end of your Siamese cable to the camera, the other to the DVR video inputs (which ever channel you would like this camera to display, use that video input). Once these are all made we can properly access the OSD from the DVR.
IMPORTANT!
Please make sure you DO NOT have any of the positive and negative wires crossed, this will cause the OSD to not be available and you WILL NOT be able to access it at the DVR.
Now that your PTZ is all wired correctly lets take a look at the OSD!
Once your PTZ is connected to the DVR and you can clearly see that you have video, you can begin to access the OSD. First, right click-main menu-login-settings-PAN/TILT/ZOOM. The screen should look like this (Below).
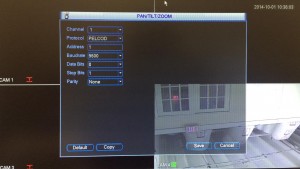
Basically what we are doing here is configuring the OSD to be operational on a specific channel. My PTZ, as you can see, is on channel 4 so under channel, I will select 4. Select what ever channel your PTZ is connected to, then make sure the protocol is set to PELCOD, and the address set to whatever address you have the PTZ set to. Same thing with the Baudrate, defaulted it will be 9600, but you are just setting these settings to match the settings of the camera, then click save. Once this is done you can right click out of the menus, and double click the channel your PTZ is on. Once you have it blown up, right click, and click PAN/TILT/ZOOM. That should bring up the controller for the PTZ. Go ahead and click the right arrow, left arrow, etc. Make sure the zoom in and out are working. Just play around for a second and make sure the camera is functioning properly. Change the speed that the camera will pan. As long as all those things work you are ready to configure your presets.
ATTENTION!
To access the OSD of this camera and not the PTZ controller, on this menu you will click the plus sign next to IRIS, and that should bring up the OSD. The arrows are still used to guide through the menus and the plus sign becomes your enter button.
A preset is a spot that the PTZ will stop at when configured and once you get a couple of presets configured you can change between different images of your choice. So you can have this camera on the corner of your home, set preset 1 to look to the right side of the house, zoomed in to the driveway. Then set preset 2 to look to the left side of your house, zoomed out to have a wide shot. If you click on preset 1 the PTZ will automatically pan to the right side of the house, zoomed into the driveway giving you the exact same image you preset before. Now, click preset 2, and the PTZ will pan to the left side of the house at a wide angle as you previously set. This way you don’t have to do all the zooming or tilting to get that perfect image. Do it one time, make it a preset, and let the camera do the rest of the work.
How to set the presets…
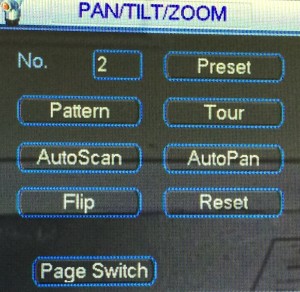
Get to the desired shot, click set and another menu should pop up, next click preset and put the number you wish that shot to be as a preset and click set. Right click out of the second menu and do the same thing for each of you presets making them a different number. Once the presets are set to your liking, the way to access them (Call Presets) is as follows: click page switch until you see this screen (As shown below), change the number to the preset you wish to view and click preset. That should be it, it should go straight to the preset you configured earlier, and so on so forth for the rest of your presets. That’s it, that is how easy it is to set up the presets on this particular model PTZ.
I Hope this article was of help to you and for additional how-to articles or videos, visit our CCTV learning center.


