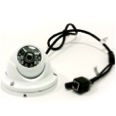


Onvif Cameras have become very popular these days and many companies are adopting this new open protocol to integrate with other equipment brands.
Today I will introduce our new line of ONVIF cameras (our TP Series) with a new and elegant style, that promise to be an easy and great setup for your CCTV needs.
One of the greatest thing about this new line is the variety of models we are offering from bullet style, varifocal & fix lenses to small ball domes that can be installed in no time.
As I mentioned before, Onvif (Open Network Video Interface Forum), is an Open Industry aimed to facilitate the communication of IP based video products with other devices that are not necessarily from the same manufacturer. Some ONVIF products require to have certain features turned ON before integrating with any equipment that is not from the same brand. In my opinion and as a rule of thumb I always configure each device first to avoid any misconfigurations, then I will end connecting these to the recorder.
For this demonstration I will be using an IPID-TP2MPIR50L2812-W. The settings and access setup is the same throughout the entire TP-Series Cameras. Some settings such as brightness, sharpness, WDR, etc need to be adjusted depending of the environment where the cameras are mounted.
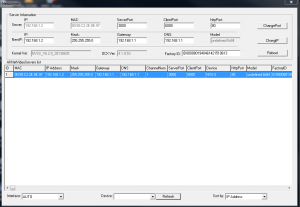
Like any IP based device it will require to know its IP address, or at least have a way to find it. These cameras come with a default IP of 192.168.1.2 or sometimes will be set to DHCP. The best way to approach this is by downloading and using the TP-IP Series Search Utility.
The first step to connect to the camera is to find its IP. Open the finder and click on refresh, the result will show below:
Select the resultant IP address and here you can change some settings such as port, IP address, mask, etc. I suggest to only change IP Address related settings and not change the ports.
Internet Explorer Settings
Internet Explorer is the only web browser that will work without any add-ons, and is in fact the only browser supported 100% with our DVRs/NVRs and IP cameras.
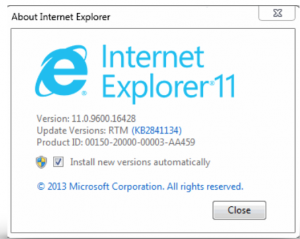
To access your camera with Internet Explorer, is important to know what version is currently installed in your computer. To do so, open internet explorer and click on Help>About Internet Explorer. A window will open and you can see the current version running in your computer.
This particular version of Internet Explorer has been optimized for better graphics, performance, etc. The steps to connect to the camera are the same exempt now you will need to add the IP address of the DVR/NVR/IP Camera to the compatibility view settings of the software in order to show correctly.
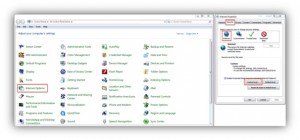
1.- Go to Start button>Control Panel and Internet Options.
2.- Click on the Security Tab, then custom Level…
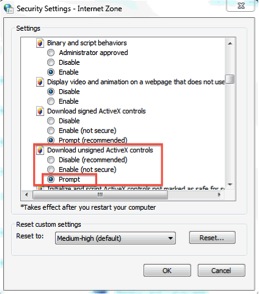
3.- On the next window we will scroll down to look for an option labeled “Download Unsigned ActiveX Controls”. Select “Prompt” and click OK.
At this point you should be all set to access your Camera.
4.- Open Internet Explorer and type the IP address of your camera. If you are performing these task from the same location were the camera is, then type the internal IP address.
If this is the first time you are trying to connect to the IP camera then it will not show correctly. You will encounter this issue if you are using Internet Explorer Version 11, which is the latest version Microsoft is offering on computers running Windows 7 and Windows 8.
Connecting to the camera for the first time
Once you have configured Internet Explorer, the next step is to connect to the camera. Input the default IP address 192.168.1.2, or if you have changed the address then you will need to use that instead.
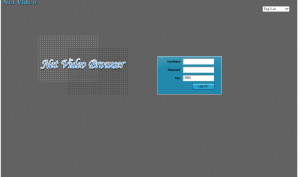
A log in page will show up after the necessary Activex Files finish installing. The Default username is Admin/Admin.
Click on Configure to access the settings of the camera and begin enabling features like Motion, Schedule, Resolution, etc.
Configuring Motion & Schedule Detection
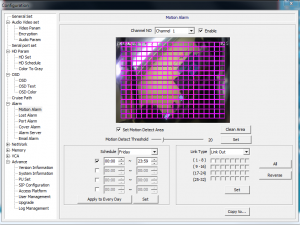
This is one of the main features that you should configure to allow the camera to record when there is movement. To do this click on the configuration panel on the left side and locate “Alarm”.
Once there, click on the top check mark to enable motion and proceed to select the Motion detection Area. Click on “Set Motion Detect Area” and drag you mouse across the picture to select the area you want the camera to detect motion, like in the picture above, and show the desire selection. Adjust the “Motion Detect Threshold” to adjust the sensitivity. The higher the number the more sensitive to movement the camera will be. Click on “Set” to save those settings. Move down to schedule and change the timing from “00:00 – 23:59”, this will make the camera enable motion 24/7 for a specific day. Click on ”Apply to Every Day” then “Set” to save these settings. NOTE: when you move to another menu and decide to come back to the Motion Alarm settings, you will notice that the area you have selected for motion will not show up. Don’t panic, the settings are there, you just need to click on “Set Motion Detect Area” again and the area will reappear.
Configuring Encoding Resolution
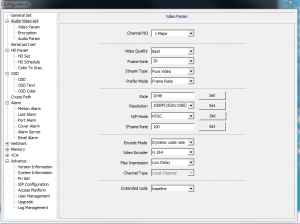
Encoding will be one of the most fundamental settings you will need to understand and configure correctly. These settings will allow you to setup how the camera will broadcast the video resolution and quality to the NVR and smartphones.
The settings above are the most common when it comes to configuring the Main Stream of the camera. These settings will be the ones the NVR will record with and it will affect the quality of the recordings if this is set incorrectly. You should set your cameras this way but sometimes it will be necessary to decrease these settings if you lack on bandwidth to stream IP cameras over the Internet.
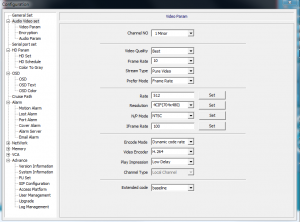
Lastly the settings for the Sub Stream should be as follows:
The Sub Stream is basically how you will see your cameras over a smart phone or tablet. These settings are usually at a lower frame rate and resolution (D1), without compromising quality on the video recording. Make sure you click on “Set” when changing any of these settings so the changes will stick.
NOTE: If you are using an NVR with PoE Switch build in, then you will need to configure the camera’s IP address to match the PoE IP address range. When ready to connect the camera then you need to add the camera manually utilizing Onvif as the Manufacture and the HTTP port number is 8080. Once that is all set, click add and the video will start streaming over the NVR.
There are many features in this camera that will make this article incredibly long but these are some of the essential settings you should have when connecting them to your NVR. For more information visit us a www.securitycameraking.com

