Planning is important!
In order to add an IP camera to the network, your cameras need to be on that same network. There are many ways to accomplish this feat, but the first piece of information needed is how the cameras will receive power. This article will explain the proper technique in networking IP Cameras. You can use a built in Power Over Ethernet (POE) Switch (providing your NVR has one), an external power supply, or an external Power Over Ethernet (POE) Switch. If you do not have an external Power Over Ethernet (POE) switch or a separate power supply, you can use the built in Power Over Ethernet switch of your Network Video Recorder to supply power and create the network. You would need to plug your computer into the POE switch along with the camera so your computer can receive an IP address from the built in POE switch. The built in POE switch acts as a router and creates a network that is separate from the network that the Network Video Recorder will join. The default gateway address for most Network Video Recorders’ Switch is 10.1.1.1, and many units allow this number to be changed. If you would like to change this network range, look for a section labeled “Switch” in the Networking area of the menu.
It is very important to always plug IP cameras in one at a time to avoid IP conflicts. Many people have used analog systems in the past, so they tend to plug in all their cameras at one time. With that being said, it is a good idea to use best practices and number your cameras with static IP addresses in a block. If you are using a built in POE switch, then all IP addresses are available since the switch creates its own network. If you do not have a built in POE switch, then you should ping an entire block to make sure they are available. For Example, if your gateway is located at 192.168.1.1, then you can start pinging from 192.168.1.200 to 192.168.1.216 if you have a 16 port POE switch. This will ensure that the IP cameras are easy to find and there are no IP address conflicts.
Don’t throw away your old router just yet, because you may need it to configure IP cameras. If you have trouble finding the cameras, you can use an old router to configure them. You can change the network of the router to match the cameras, and then plug your computer in to receive an IP address on the same network. You do not need an expensive router, but any that will allow you to adjust the gateway address. This can be a very handy tool, and is worth having if you install many IP cameras. Keep in mind the cameras still need to receive power via a POE switch or a separate power supply. The encoding is done at the camera level with IP cameras, so it is best to adjust all your settings prior to placing them in the permanent home.
What is the best way to Network the TP series cameras?
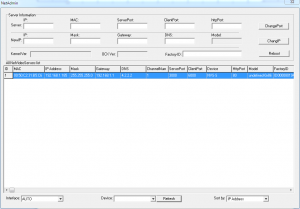
 If your Network Video Recorder does not have a built in POE switch, you should be able to find the TP series cameras using the TP Series IP Camera Search Utility that is available in our website downloads section providing you have an external POE switch or an external power source.
The camera should appear in the list window, but if you do not see it simply hit the Refresh button at the bottom to see if it will populate. The default IP address for a TP series camera is likely 192.168.1.2, but check your manual to verify this information. If you are not using an external POE switch, you can plug the camera into your router and supply power to it using a separate power supply. This will also allow you to adjust the IP address and the settings of the camera temporarily until you provide a permanent home for the camera.
What is the best way to Network the EL series cameras?
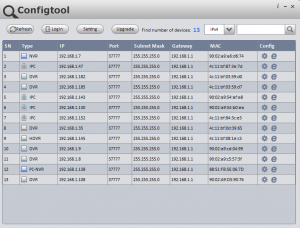
The first thing we need to do is find the camera. The EL cameras require the EL camera finder utility, also known as the Config Tool to find the camera. These cameras are different than the TP cameras in the sense that they will take a dynamic IP address when plugged into a switch. While this may make them more plug and play than the TP cameras, it is still recommended to follow best practices and set every camera to its own static IP so that you know where each one is located and the number does not change. The Config Tool will allow you to change the IP address and network information in the camera just like the TP finder tool.
Should I do anything before changing the Network information in the camera?
IP cameras are controlled at the camera level, so you need to set them up prior to plugging them into a built in POE switch. For example, you may decide that you want motion detect, so that will need to be enabled in the camera settings. More important is the encoding section, and that needs to be set in the camera as well.
If you have already set up the camera and plugged it into a built in POE switch, you can still log into the camera from there. You need to plug a computer into the same POE switch so that it receives an IP address from the switch. This will put the camera and your computer on the same network and allow you to log in and make changes. If you need to leave your computer plugged into the router, you can also change the IP address back to match your computer so that you can make changes and then change it back again. As long as your computer and camera are on the same network, you can log in and make changes to the configuration.
NOTE: The TP series cameras have templates which can change many settings. We recommend using the Motion template under HD Param as a starting point. Also, change the HD Schedule to motion, and use Auto(alarm) in the Color To Gray section. We find these settings to be a great starting point for indoor and outdoor uses of the TP camera.

