When you hear the word DVR you automatically think of Digital Video Recorder. Well, what kind of DVR? Cable companies like Xfinity use DVR technology intergraded with cable hardware so you can view hundreds of channels and record up to 4 broadcasts at the same time (of course monthly DVR service fee applies). The security camera industry uses DVRs to record video and audio data to internal hard drives. It is safe to say that there are IP security cameras that can blow away the traditional analog security camera system, but it really takes a lot of configuration, networking equipment and sometimes big money. Now you have the new HD-CVI systems like the 4 channel 1080p HD-CVI Mini DVR. In this article I will go over the on-board accessories and what you can do with them using the proper configurations with both hardware and software. First I will talk about the inputs:
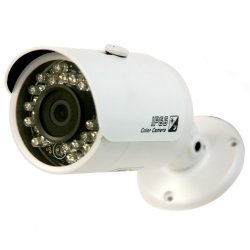 The 4 channel 1080p HD-CVI Mini DVR has 4 HDCVI video inputs which accept 2 megapixel resolution HDCVI cameras like the CVIOB-EL2MPIR50 that is one of my favorites. These HDCVI cameras are motion detection 100% compatible giving you a great way to not only save hard drive space, but add more days to your recordings. This unit can do wonders when configured correctly; you are able to configure detailed settings in the OSD and at the HDCVI DVR.
Also, the max run on the video feed is a block busting 1600 FEET.

Motion Detect Example: You can install a 2MP HD-CVI Bullet Camera (CVIOB-EL2MPIR50) at a door entrance that requires a person on the other end needing access through that door. You can not only get that camera feed from the door when the motion is triggered, you can also give the authorized person access from anywhere on site or off site. The configuration is simple all you have to do is have the proper alarm inputs and outputs configured properly both hardware and software.
This unit also can hold (2) 7200 RPM 4TB internal hard drives for ultimate recording.
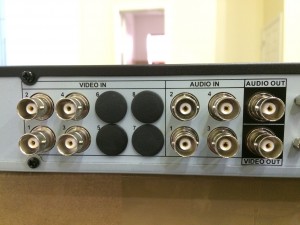
This 4 channel 1080p HD-CVI Mini DVR also provides 4 audio inputs for real time listening and recording. This feature is perfect if you want to set up 2-way audio communications in a warehouse or at a big company property or just wanting to listen and record audio for future evidence. The connection is simple first you will need powered microphones for the audio inputs and an amplified speaker for the audio output for the listening part, remember all audio can be configured for recording.
The RS-232 is the on board serial port (serial communication transmission of data) for old school configurations. Ordinary COM (Debug), keyboard connection and transparent serial port (COM input and output via network )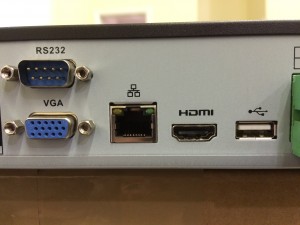
USB inputs are used by the control mouse to maneuver through the DVR’s menus.
The RS485 port is not needed to use to control our HD-CVI pan tilt zoom cameras like the 720P HD-CVI PTZ with 250 Ft IR. This camera is priceless having the ability to record 1.3 megapixel images while having the ability to zoom in on a perpetrator for real time action. A great benefit of the HD-CVI DVR is that there is no need to run extra wires when wanting to add a CVI PTZ because the transmission is all done through the coax RJ59 cable.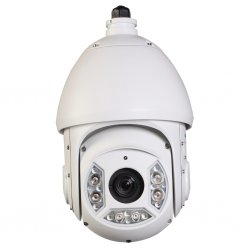
The RJ45 is a 10M/100M/1000M self-adaptable Ethernet port. This connection is what the HDCVI DVR uses to establish the link to the inside and outside world using a router. Without this technology we would not be able to communicate using our PC, MAC or mobile device whether it is an HD-CVI, analog or IP security system.
Alarm inputs is my main focus in this article. Using this feature in the HD-CVI Mini DVR combined with the alarm outputs can create a complete secured location. The alarm relay is 30VDC 2A,125VAC 1A (activation alarm).
Example: You can configure this unit’s alarm capabilities to alert you when sitting at an office environment so when a person walks through a first door or detected by a beam detector it can trigger a sound using a buzzer. This will direct your view to a monitor configured to bring up a camera in that area so you can then use the DVR’s interface or web service to let them in, or you can even use your compatible mobile device to see who is at the front door and give them access.
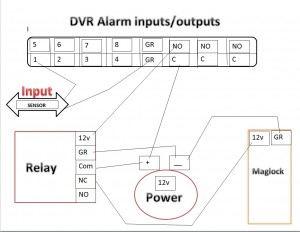

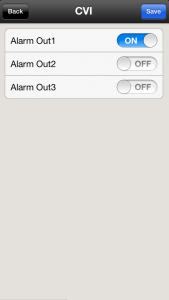
This set up would involve an analog door sensor or beam detector, a single 12V relay, a maglock or a normally closed door strike, 12V power supply, high grade alarm wire and a 4 channel 1080p HD-CVI Mini DVR. The configuration is simple: First you wire and configure the power supply to the relay and then you wire and configure the DVR alarm inputs and outputs to the (output) MAGLOCK and the (input) to the sensor. The next step is to set up in the GUI ( Graphic User Interface ) at the HDCVI DVR.
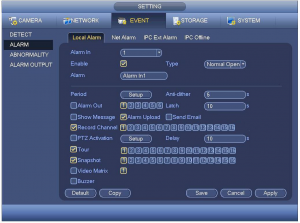
First, if using the unit’s interface you can click on the setup tab and then click on the event tab and go to the alarm page. There you will configure the alarms inputs and outputs. You start out by enabling the channels and setting the type, antidither, record channel, delay, alarm out, latch and tour remember to hit save after the configuration.
Outputs:
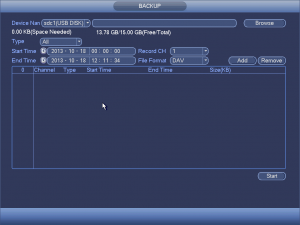
USB outputs that uses thumb drives for backing up settings and events.
Alarm outputs, like I mentioned previously in this article, give you ultimate access controls right at your finger tips. Imagine if you had control over door security when a burglary or an in-house crisis arises. You can really try to control the situation if you can restrict access to doors leading to potential victim’s right from your PC or a mobile device.
Video BNC output can be configured using the spot out matrix control. You can display desired video windows and tours with out seeing the configuration menus. The HDMI and VGA outputs will display the HDCVI’s full menu functions but you can still configure these monitors to display a tour.
The audio output is used to configure a speaker for listening purposes.
In conclusion the 4 channel 1080p HD-CVI Mini DVR can be used for many many configurations. It is a cost effective unit and at the same time performing at optimal peaks using the inputs and outputs of this new technology would put you ahead of the game.

