Replacing a BNC connector on a security camera cable is a straightforward process that can help restore your video feed if the connector becomes damaged or worn out. Here’s a step-by-step guide to help you replace a BNC connector:
Tools Needed:
- Coaxial cable stripper
- Wire cutters
- BNC connector
- Crimping tool or small screwdriver
- Soldering iron and solder (optional)
- Heat shrink tubing (optional)
- Electrical tape (optional)
Step-by-Step Process:
- Power Off: Ensure the security camera system is powered off to prevent any electrical damage or injury.
- Remove the Old Connector:
- Cut the Connector: Use wire cutters to carefully cut off the old BNC connector from the cable.
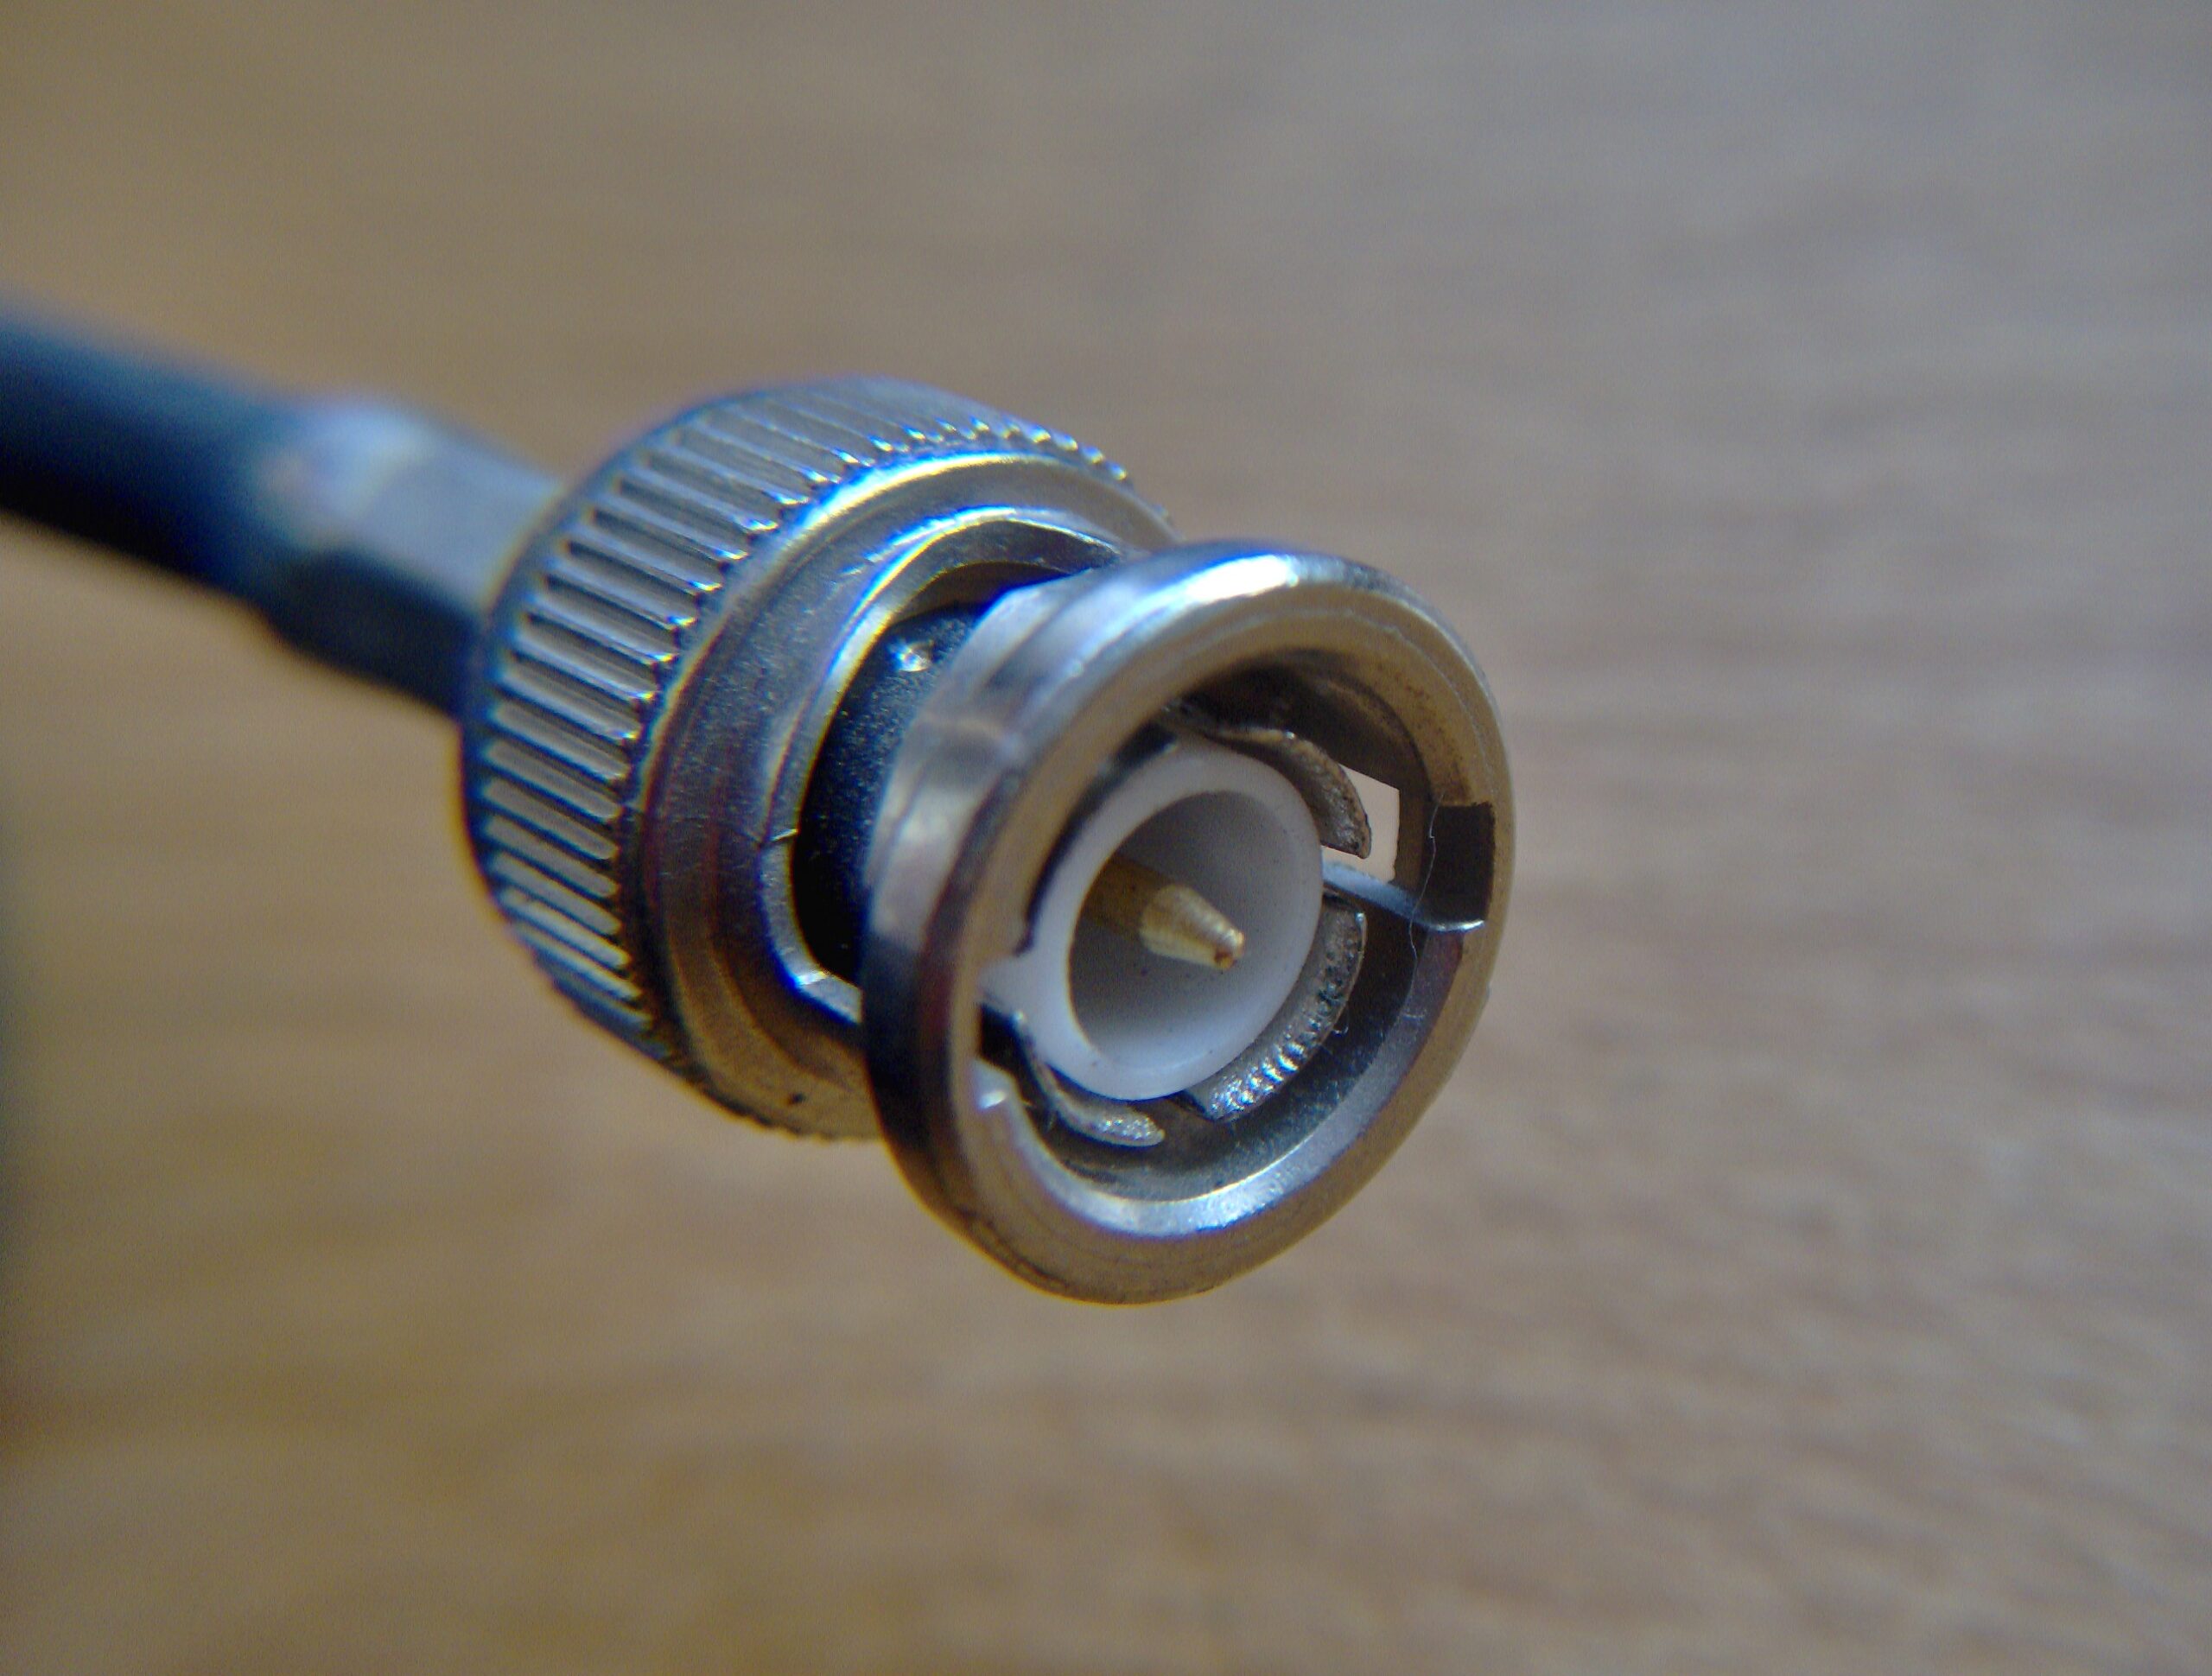
- Strip the Cable: Use a coaxial cable stripper to remove about 1 inch (2.5 cm) of the outer insulation, exposing the inner conductor and the braided shield.
- Fold Back the Shield: Fold back the braided shield over the outer insulation and cut the dielectric to expose the center conductor.
- Prepare the New Connector:
- Insert the BNC Ring: Slide the BNC ring onto the coaxial cable.
- Fit the BNC Pin: Insert the BNC pin onto the center conductor of the cable.
- Secure the Connector:
- Insert into Main Body: Push the cable into the main body of the BNC connector until you hear a click.
- Crimp the Metal Ring: Use a crimping tool to crimp the metal ring over the cable braid and the BNC body, securing the connector in place.
- Cut Excess Braid: Trim any excess cable braid for a clean finish.
- Test the Connection:
- Reconnect the Camera: Reconnect the cable to the security camera and power on the system.
- Check Video Feed: Verify that the video feed is clear and stable.
Optional Steps for Enhanced Security:
- Soldering: For a more secure connection, you can solder the center conductor to the BNC pin before crimping the connector.
- Heat Shrink Tubing: Apply heat shrink tubing over the crimped area to provide additional insulation and protection.
- Electrical Tape: Use electrical tape to wrap around the connector for extra security.
Benefits of Replacing a BNC Connector:
- Restored Video Quality: A new connector ensures a clear and stable video feed.
- Increased Reliability: Reduces the risk of signal interruptions or security breaches.
- Extended Equipment Lifespan: Prevents long-term damage to the camera and other components in the surveillance system.
By following these steps, you can easily replace a BNC connector on your security camera cable and maintain optimal performance of your surveillance system.
Related Products
Frequently Asked Questions (FAQ)
1. Why might I need to replace a BNC connector on my security camera cable?
Replacing a BNC connector can be necessary if the existing one is damaged, corroded, or no longer providing a reliable connection. This can help restore video quality and ensure the security system functions properly.
2. What tools do I need to replace a BNC connector?
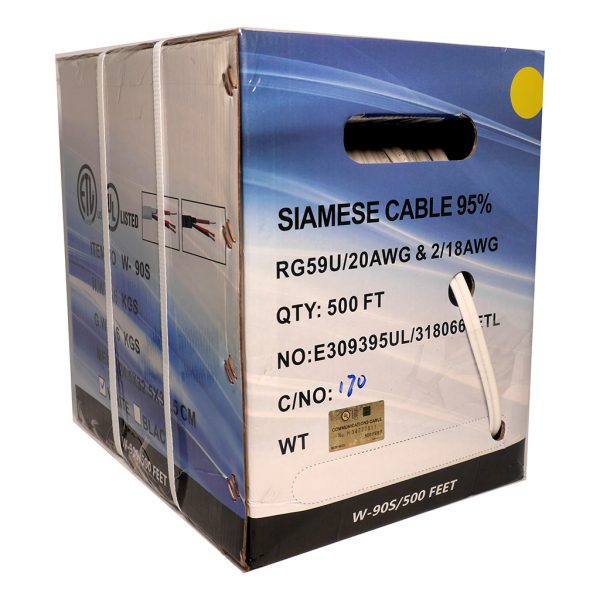
To replace a BNC connector, you’ll need:
- A new BNC connector
- Coaxial cable stripper
- Coaxial cable crimper
- Utility knife or scissors
- Heat shrink tubing (optional)
- Electrical tape (optional)
3. What is the step-by-step process to replace a BNC connector?
- Power Off: Ensure the security camera and DVR are powered off to avoid electrical shocks.
- Cut the Cable: Use a utility knife or scissors to cut the coaxial cable just below the damaged BNC connector.
- Strip the Cable: Use a coaxial cable stripper to strip about 1/2 inch of the outer insulation. Be careful not to damage the inner conductor or shielding.
- Prep the Cable: Fold back the braided shielding over the outer insulation. Strip about 1/4 inch of the inner insulation to expose the inner conductor.
- Attach the BNC Connector: Slide the new BNC connector onto the prepared cable. Ensure the inner conductor goes into the central pin of the connector and the outer shielding makes good contact with the connector body.
- Crimp the Connector: Use a coaxial cable crimper to securely crimp the connector onto the cable. Ensure it is tightly fastened.
- Optional Protection: Slide heat shrink tubing over the connector and apply heat to secure it, or use electrical tape to cover any exposed areas.
- Reconnect: Once the connector is secure, reconnect it to the security camera or DVR.
- Power On: Power on the equipment and check the video signal quality.
4. Are there any tips for ensuring a successful replacement?
- Double-check the connections to ensure they are secure and there is no exposed wire.
- Use high-quality BNC connectors to ensure longevity and reliable performance.
- If you encounter any issues, consider seeking professional assistance.
5. Can I use the same process for different types of security cameras?
Yes, the process for replacing BNC connectors is generally the same for various types of security cameras that use coaxial cables. Just ensure you have the correct type of BNC connector for your specific cable.