Connecting an IP camera to a network allows you to monitor your premises remotely and store footage securely. Here’s a step-by-step guide to help you get started:
Step 1: Choose Your Connection Method
- Wired Connection: Use an Ethernet cable (Cat 5 or Cat 6) to connect the IP camera to your router or switch. This method provides a stable and secure connection.
- Wireless Connection: If your IP camera supports Wi-Fi, you can connect it wirelessly to your network. Ensure your Wi-Fi network is stable and secure.
Step 2: Power Up the Camera
- Plug in the Power Adapter: Connect the IP camera to a power source using the provided power adapter. Some cameras may use Power over Ethernet (PoE), which combines power and data transmission through a single Ethernet cable1.
Step 3: Connect to the Network
- Wired Connection: Plug one end of the Ethernet cable into the camera’s Ethernet port and the other end into your router or switch.
- Wireless Connection: Follow the camera’s manual to connect it to your Wi-Fi network. This may involve scanning a QR code or entering a Wi-Fi password.
Step 4: Find the IP Address
- Using the Vendor’s Utility Program: Many camera manufacturers provide utility software that can scan your network and find the camera’s IP address.
- Using Command Prompt: On a Windows computer, open Command Prompt and type ipconfig to find your computer’s IP address. The camera’s IP address will be in the same subnet1.
Step 5: Access the Camera’s Web Interface
- Open a Web Browser: Type the camera’s IP address into the browser’s address bar and press Enter.
- Log In: Use the default username and password provided in the camera’s manual to log in.
Step 6: Configure Network Settings
- Set the IP Address: Change the camera’s IP address to match your network’s IP scheme.
- Update Firmware: Check for and install any firmware updates to ensure your camera is running the latest software.
Step 7: Test the Connection
- View Live Feed: Use the camera’s web interface or a dedicated app to view the live feed.
- Check Storage: Ensure that recorded footage is being saved to the desired storage location, whether it’s a local hard drive, network video recorder (NVR), or cloud storage.
Step 8: Secure the Connection
- Change Default Passwords: Always change the default username and password to something more secure.
- Enable Encryption: Use encryption (e.g., WPA2 for Wi-Fi) to protect your network and camera data.
Related Products
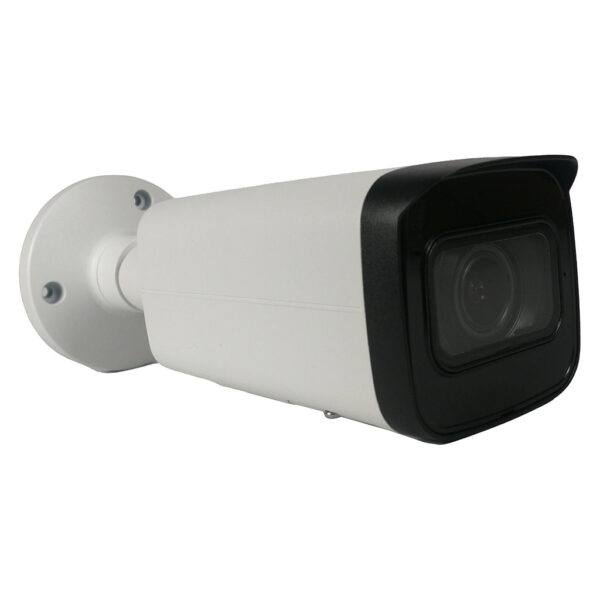
ELITE 2MP IP Motorized Lens Long Range Bullet W/External Mic Audio & EPoE
Specifications
- Lens: 5~60mm Motorized Lens
- Max Resolution: 2MP
- IR Distance: 656 FT
- Impact Protection: IK10
- Audio: Audio Capable With External Mic
- SD Card Compatible: Yes
- Perimeter Protection: Yes
- Object Detection: Yes
- Face Detection: Yes
- Face Recognition: No
- Smart Motion Detection: No
- LPR: No
ELITE 4MP IP Motorized Varifocal Bullet W/built Mic & SD Card Slot
Specifications
- Lens: 2.7 mm–13.5 mm Motorized Varifocal Lens
- Max Resolution: 4MP
- IR Distance: 196 feet
- Audio: Built In Mic
- SD Card Compatible: Yes
- Perimeter Protection: Yes
- Object Detection: No
- Face Detection: No
- Face Recognition: No
- Smart Motion Detection: Yes
- LPR: No
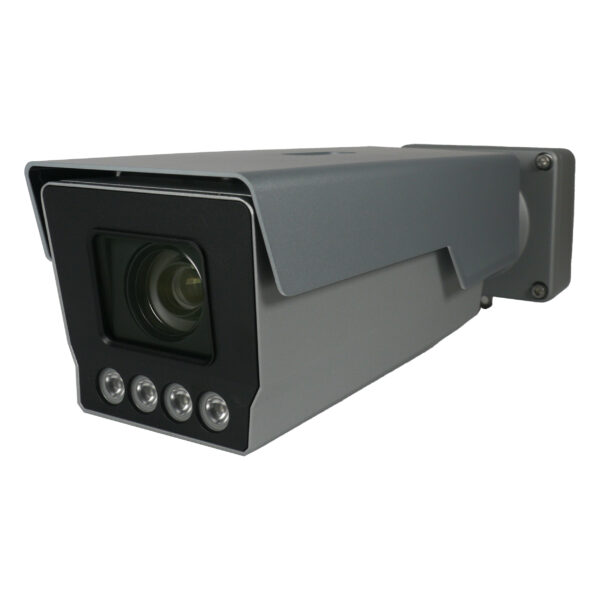
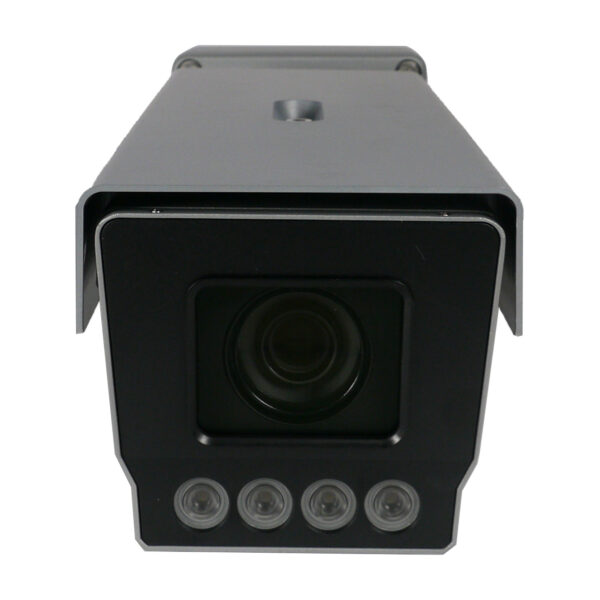
4MP ELITE Series AI Traffic Enforcement Camera
Specifications
- Camera: IPLPR-EL4IR30Z5X-AI
- Lens: 10mm-50mm
- Max Resolution: 4MP
- IR Distance: 98.43 FT
- Impact Protection: IK10
- Audio: Capable With External Mic
- SD Card Compatible: Yes
- Perimeter Protection: Yes
- Object Detection: No
- Face Detection: No
- Face Recognition: No
- Smart Motion Detection: No
- LPR: Yes
Frequently Asked Questions (FAQ)
1. How do I connect an IP camera to my network?
- You can connect an IP camera to your network using either a wired Ethernet cable or wirelessly via Wi-Fi.
2. What is Power over Ethernet (PoE)?
- PoE is a technology that allows network cables to carry electrical power along with data, eliminating the need for separate power supplies.
3. How do I find the IP address of my IP camera?
- You can use the vendor’s utility software, scan your network with a network scanner app, or check the camera’s manual.
4. What should I do if I can’t find my IP camera on the network?
- Ensure the camera is powered on, check your network settings, and verify that the camera is discoverable.
5. How do I secure my IP camera connection?
- Change default passwords, enable encryption, and regularly update the camera’s firmware.